Tuesday, June 29, 2021

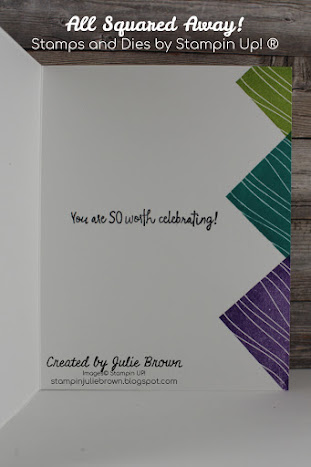
All Squared Away Creating your Background

Thanks for stopping by today!  I don't know about you but I always forget how great cards can be when we use our stamp sets to create a background. 

For this card I used the All Squared Away Bundle.  I added in some Thick and Regular Basic White and Basic Black card stock.  

Below is the card cuts, video link and supply list for this card!

Card Cuts:

Card Base: Thick Basic White - 5 1/2 x 8 1/2 scored at 4 1/4

Layer 1 - Basic Black - 4 1/8 x 5 3/8

Layer 2 - Basic White - 4 x 5 1/4

Layer 3 - Basic White - 2 x 4

Layer 4 - Basic White - 1 1/2 x 1 1/2

Video Link: https://www.youtube.com/watch?v=32Q9HFYDaZE


If you like my cards, don't forget to follow me by adding your email to the right under the "Follow Me" section.

I would also love to hear from you and what you think of my cards.  If you will scroll all the way to the bottom you will see a place to add your comments. 


Supply List: If you'd like to purchase any of the items I used to make this card just click on any of the pictures below!

Product List

Party Puffins and Circles

Thanks for joining me today!  For this card I wanted to work with two new products by Stampin Up®.  

The Party Puffin Stamp Set and the Picture This Dies.  This is not a bundle but they go together great!  Stampin Up® has come out with several stand alone dies that can work with any of their numerous stamp sets.  

The neat thing about this card is that I was able to use the circle cutouts to make another card. (Watch for it later this month in my blog)

Here are the card cuts, instructions and supply:

Card Cuts:

Card Base - Basic Black 5 1/2 x 8 1/2 scored at 4 1/4

Layer 1 - Basic White - 4 x 5 1/4

Layer 2 - Ombre Specialty Paper - 4 x 5 1/4

Layer 3 - Basic Black - 1/2 x 2

Layer 4 - Basic White - 4 x 5 1/4

Instructions:

1. Layer 2 - Using the Picture This dies cut out frame. (save circle cut outs for another card)

2. Layer 1 - Lay Layer 2 over this layer and trace circles lightly with a pencil.

  • Then mask off the part of the Puffins that will not show in the circle, ink up with Black Memento ink then stamp each of the images as shown. 
  • Color in with Stampin Blends.
  • Allow ink to dry just a bit then erase all the pencil lines.
  • Adhere Layer 2 over this layer then adhere them both to the front of the card front. 
3. Layer 3 - Using Versa Mark ink stamp sentiment.
  • Cover with White Embossing powder, knock off excess powder then heat it up with heat gun.
  • Adhere to the card front as shown.
4.  Using Bermuda Bay stampin blend color in several Basic Rhinestones and adhere them to the card front as shown.

5. Layer 4 - Using Black Memento ink stamp the sentiment onto the center of the sheet. 
  • Then stamp the candles in the bottom right hand corner and color in with Stampin Blends. 
  • Adhere to the inside of the card. 

Supply List: I'd love to be your Stampin Up® demonstrator, to place an order just click on any of the pictures below!
Product List


Friday, June 25, 2021

Quick and Easy Hats Off Masculine Card

Here's a great Masculine card that any man or boy would love to get.  Don't forget to make it for the ladies just change out the colors of the background paper and hats. 

For this card I used Hats Off Bundle by Stampin Up®  I brought in the In Good Taste Designer Series Paper and Basic White, Night of Navy and Crumb Cake card stock. 

Here are the card cuts, instructions and supply list to make this card!

Card Cuts: DSP = Designer Series Paper

Card Base - Night of Navy - 5 1/2 x 8 1/2 scored at 4 1/4

Layer 1 - In Good Taste DSP - 4 x 5 1/4

Layer 2 - Night of Navy - 1 x 4

Layer 3 - Basic White - 3/4 x 3 3/4

Layer 4 - Night of Navy - 3 x 4 (Hats)

Layer 5 - Crumb Cake - 3 x 4 (Hats)

Layer 6 - Basic White - 4 x 5 1/4

Instructions:

1. Layer 1 - Adhere to the front of the card base.

2. Layer 2 - Adhere to the Layer 1 centering on card.

3. Layer 3 - Using Night of Navy ink, stamp the sentiment.

  • Adhere to Layer 2 on the card front.
4. Layer 4 - Using the Hat Builder dies cut out 4 Night of Navy hats. Set aside.

5. Layer 5 - Using the Hat Builder Dies cut out 3 of the Crumb Cake hats.
  • Adhere both the Night of Navy and Crumb Cake hats to the card front as shown. I did pop us the 2 crumb cake hats above and below the sentiment using Stampin Dimensionals. 
6. Layer 6 - Using Crumb Cake ink stamp the large hat into the center of sheet.
  • Next using Night of Navy ink stamp the sentiment inside the hat. 


If you like my cards and want to be notified each time I add one to my blog just add your email to the right under the "Follow Me" section. 

Here is the supply list: To order any of the supplies just click on any of the pictures below to be redirected to my online store!
Product List


Thursday, June 24, 2021

Plentiful Plants "Dear Friend"

Thanks for popping in today!  I am again showing a card I made with the Bloom Where You're Planted Suite by Stampin Up®.

This suite includes the Plentiful Plants Bundle, Bloom Where You're Planted Designer Series Paper and Paper Lattice.

This suite makes it easy to create beautiful and unique cards. 

If you'd like to be notified each time I add a card to my blog just add your email to the right under the "Follow Me" section.

Card cuts, instruction and Supply list:

Card Cuts 

Card Base - Thick Basic White - 5 1/2 x 8 1/2 scored at 4 1/4

Layer 1 - Bloom Where You're Planted DSP - 4 1/8 x 5 3/8

Layer 2 - Bloom Where You're Planted DSP - 3 1/4 x 5

Layer 3 - Paper Lattice

Layer 4 - Basic White 3 1/2 x 5 (Hanger, plant, label -1/2 x 2 1/8)

             - Garden Green - 2 1/2 x 3 

             - Evening Evergreen - 1 1/2 x 1 1/2

             - Gray Granite - 1 x 1

             - Cajun Craze - 1 x 1

Layer 5 - Evening Evergreen - 3/4 x 2 3/8

Layer 6 - Bloom Where You're Planted DSP - 1/2 x 5 1/2

Instructions:

1. Layer 1 - Adhere to the card front.

2. Layer 2 - Center onto Layer 1

3. Layer 3 - Layer onto Layer 2 lining up exactly

4. Layer 4 - Basic White piece - 

  • Using Just Jade ink stamp the vine plant leaving enough room to cut out.
  • Using Cajun Craze ink stamp the pot as shown, leaving room to cut out.
  • Now using the Perfect Plants Dies cut out the vine plant and the pot and cut out a the macrame hanger.
  • Next cut out a strip that is 1/2 x 2 1/8 then using Evening Evergreen ink stamp the sentiment. 
                - Garden Green

  • Stamp the large fern plant using Garden Green then cut out using the dies.
               - Gray Granite

  • Using the Perfect Plant Dies cut out one of the small plant holders 
               - Cajun Craze

  • Using the same die as above cut out another small plant holders
              - Evening Evergreen

  • Using the dies cut out one of the small aloe plants
Adhere all the pieces to the card front as shown. Except for the sentiment strip.  (Note: Macrame Hanger and pot are popped up with dimensionals)

5. Layer 5 - Adhere the sentiment strip from above to this piece then adhere them both to the card front as shown.

6. Layer 6 - Adhere along the bottom edge of the inside of the card.
  • Using Evening Evergreen ink, stamp the sentiment as shown. 
7.  Adhere one of the rhinestones to the hole in the top of the Macrame holder. 


Hope you enjoyed this card and thanks again for stopping by my blog today.  Here is the supply list of products used to make this card!  If you would like to purchase any of the products just click on the pictures below!

NOTE:  I have listed the suite as well as the individual items used to make this card!  I did this because it's easier to enter just one item number if your interested in the suite.  Also you can purchase the stamp set and punch separately but I always list them as a bundle you save 10% by purchasing bundles as a bundle!

If you have any questions about ordering please feel free to contact me!


Product List