Monday, May 24, 2021

Hand-Penned and Rose Metallic Specialty Paper by Stampin UP®


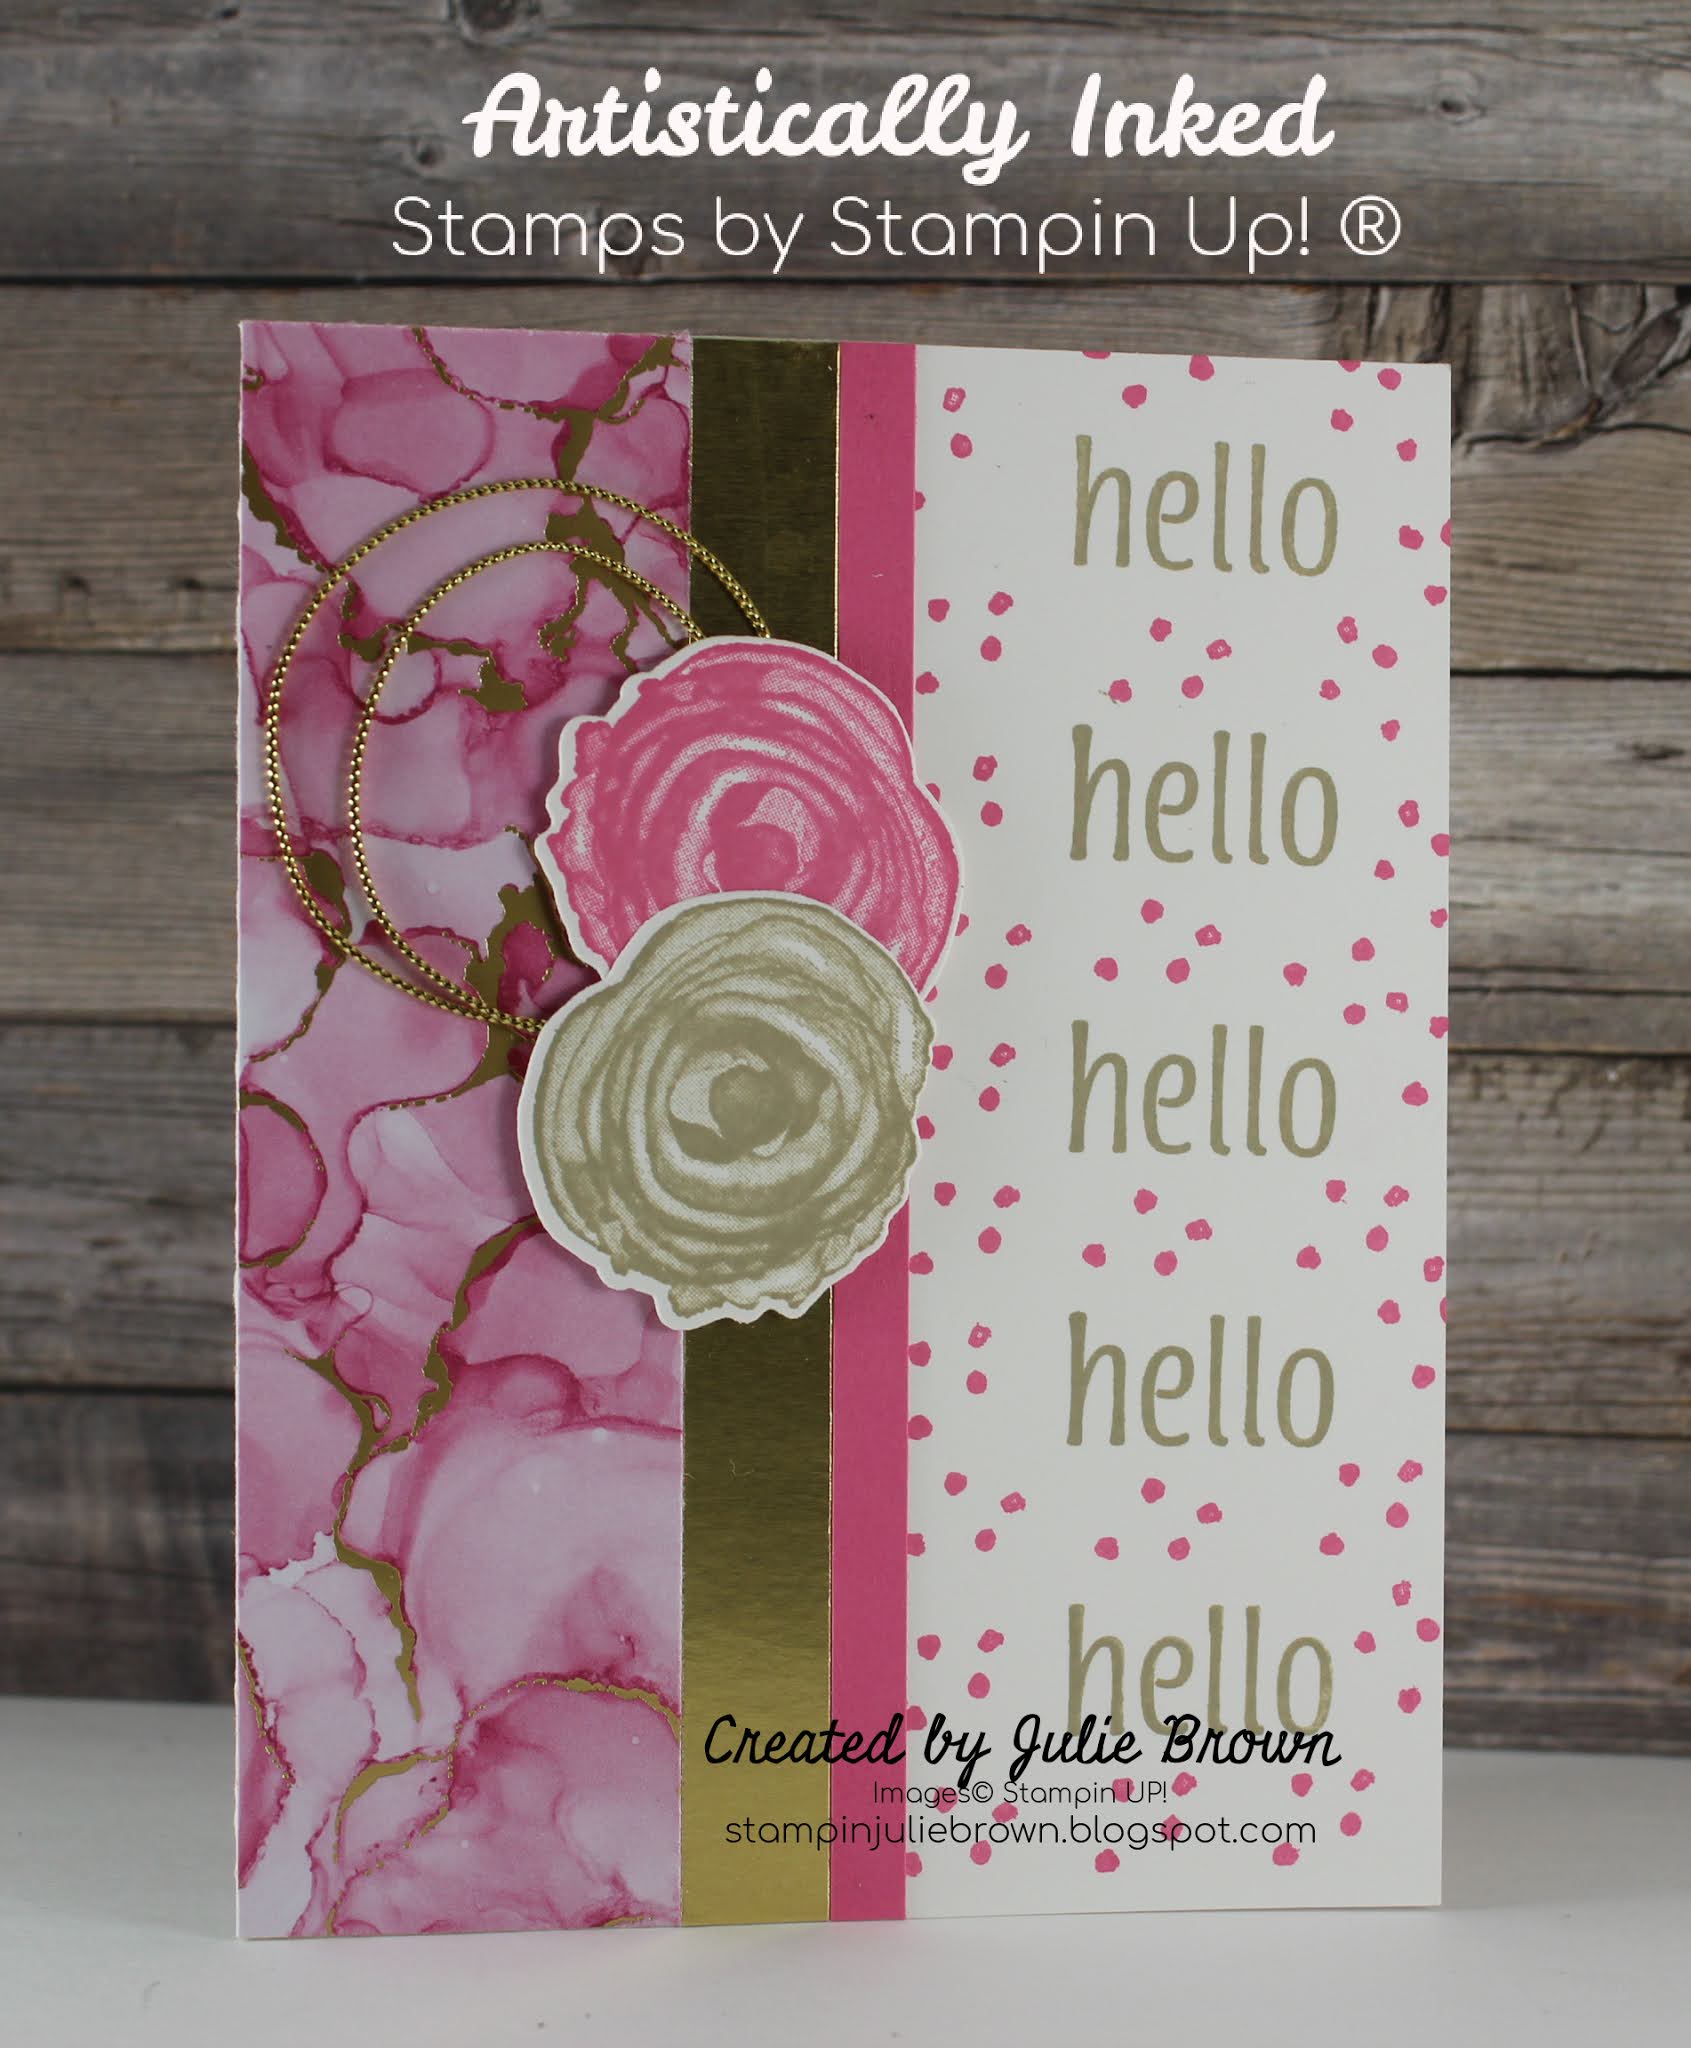
If you like sparkle then this is the card for you!  I used the Hand-Penned Suite by Stampin Up® for this card!  The suite includes, Hand-Penned Bundle (Stamp set and dies), Hand-Penned Designer Series Paper and Genial Gems.  


I added in the Forever Blossoms Stamp set,  the new Gold Rose Metallic Specialty Paper for the Die overlay!  It's much shinnery in person then it is in this picture.  It's quite stunning! To finish off the sparkle I colored in the flowers with Wink of Stella!

I have created several cards with this suite and will be posting them in the next few weeks and months.  If you want to be updated when I add a card just add your email to the right under the "Follow Me" section.

Here are the card cuts and instructions for this card! (The supply list will be below don't forget to check out what I used to make this card!

Card Cuts: DSP = Designer Series Paper

Card Base = Basic Black - 4 1/4 x 11 scored at 5 1/2 
Layer 1 - Hand-Penned DSP - 4 x 5 1/4
Layer 2 - Basic Black - 3 x 3 1/2
Layer 3 - Shimmery White - 3 1/4 x 4
Layer 4 - Gold and Rose Metallic Specialty Paper - 3 x 3 1/2
Layer 5 - Hand-Penned DSP - 4 x 5 1/4
Layer 6 - Shimmery White - 3 1/4 x 4

Instructions:
  1. Adhere Layer 1 to card front.
  2. Wrap ribbon in a circle then adhere to the card front using Mini Glue Dots. (You will want it to stick out on the right side of Layer 2 once you adhere Layer 2 to the card front.)
  3. Layer 2 - Using the Detailed Trio Punch, round the corners of this piece then using White Craft ink stamp the sentiment in the lower right hand corner. Adhere to the card front using Stampin Dimensionals positioning about 1/4" from left edge of Layer 1 and 1/2" from top edge. 
  4. Layer 3 - Using Black Memento ink, stamp the large flower image then color in flower using Stamp N Write markers.  I used Blushing Bride, Misty Moonlight and Just Jade.  Then use Wink of Stella to add some sparkle.  Once dry cut it out with the Die.  Adhere to Layer 2 at an angle as shown. 
  5. Layer 4 - Using the Detailed Die from the Hand-Penned Die set cut out the detailed flower die.  Then adhere it over the top of Layer 3. 
  6. Layer 5 - Adhere to the inside of the card.
  7. Layer 6 - Using Black Memento ink stamp and the Forever Blossoms Stamp set stamp the sentiment in the center.  Then stamp the flower image in the lower right hand corner as shown.  Color in as before adding Wink of Stella once it's colored.  Adhere to the inside of the card centering as shown.  
  8.  

Supply List: To order any of the products below just click on the picture. 
Product List


I would love to hear from you so please leave a comment below!


Saturday, May 22, 2021

Artistically Ink by Stampin Up® Hello, Hello

Thanks for popping by today!  For this card I used the Expressions in Ink suite by Stampin Up®.  This suite has the prettiest designer series paper.  It has the look of the Alcohol ink designs which if you have ever done you know can take a bit of time!  

This suite contains the Artisically Ink Bundle (Stamp set and dies), Expressions in Ink Designer Series Paper and the Expressions in Ink Empherma Pack (gold foil elements).  

 I have done several cards using this suite that will be posted over the next few weeks.  Don't forget to add you email to the right under the "Follow Me" sections so you will be notified each time I add a new card.  

I would love it if you would take the time to scroll to the bottom and leave me a comment.  I would love to hear what you think!


Card cuts and Instructions:

Card cuts - DSP = Designer Series Paper
Card Base - Thick White - 5 1/2 x 8 1/2 scored at 4 1/4
Layer 1 - Expressions in Ink DSP - 1 1/2 x 5 1/2
Layer 2 - Gold Foil - 1/2 x 5 1/2
Layer 3 - Polished Pink - 1/4 x 5 1/2
Layer 4 - White - 2 x 4

Instructions:

1. Using the Stamparatus, stamp the sentiment in Crumb cake ink along the right side of the card front as shown. 
2. Using Polished Pink ink stamp several of the dots on the right side of the card front as shown. 


3. Adhere Layer 1 to the card front keeping left, top and bottom edges flush.
4. Adhere Layer 2 to the card front flush to Layer 1.
5. Adhere Layer 3 to the card front flush to Layer 2.
6. Using the Artiscally Inked Stamp set, stamp two of the circle flowers, One in Polished Pink ink and One in Crumb Cake ink. Then cut out using the Artistic Dies. 
7. Form trim into a circle then adhere to card front using Mini glue dots as shown.
8. Using Stampin Dimensionals adhere the flowers to the card front layering over the trim just slightly as shown. 
9. For inside of card, Stamp the sentiment using Crumb Cake ink, then using Polished Pink ink add dots as shown. 
10. In lower right hand corner stamp the flowers one with Crumb Cake ink and one with Polished Pink ink. 

Supply List: To purchase just click on any of the pictures below!
Product List


Friday, May 21, 2021

Plentiful Plants and Simply Succulent Combo

So glad you stopped by my blog today!  So as most of you know I live in New Mexico so I get to see tons of Desert plants.  I fell in love with the Simply Succulent Bundle by Stampin Up® from the Mini Catalog and when I saw this set in the new annual catalog I knew I had to create a card using both bundles! 

For this card I used the Bloom Where You're Planted Suite which includes: The Plentiful Plants Bundle, Bloom Where You're Planted Designer Series Paper and Paper Lattice.  I added the Simply Succulent Bundle from the Mini Catalog and this is the final creation!   

I hope you like it!  Don't miss out on any cards that I post!  Just add your email to the right under the "Follow Me" section and you will be notified each time I add a new card. I usually post at least three time a week so you will get access to plenty of cards.

Below is  Card Cut Instructions and the Supply List and a video link for this card!


Card Cuts Instructions: DSP = Designer Series Paper

Card Base - Evening Evergreen - 5 1/2 x 8 1/2 scored at 4 1/4

Layer 1 - Bloom Where You're Planted DSP - 4 x 5 1/4

Layer 2 - Paper Lattice

Layer 3 - White - 4 x 5 1/4 (Stamping leaves, pots, etc)

Layer 4 - Cinnamon Cider - 2 1/4 x 3

Layer 5 - Evening Evergreen - 3/4 x 1 3/4

Layer 6 - White - 1/2 x 1 3/4

Layer 7 - White - 4 x 5 1/4


Supply List: (To purchase just click on the pictures)


Product List

Please leave me a comment and let me know what you think of this card!  I would love to hear from you!

Video Link: 

https://www.facebook.com/StampinJulieBrown/videos/1412515715780763
 

Wednesday, May 19, 2021

Beauty of Friendship "Inspiration"


Welcome!  Do you have that person in your life that has been an inspiration?  I have had several individuals over the years that have inspired me one way or another.  The Beauty of The Earth Suite was the perfect suite to create a card for all those that have contributed to my life!

The suite includes, Beauty of Friendship stamp set, Beautiful Trees Dies, Beauty of The Earth Designer Series Paper and the Bark 3D Embossing Folder (which I did not use on this card but have used in others that you will see on this blog later).

I'm in love with the colors within the Designer Series Paper but always remember to try out your sets with different colors and see what you like best!


Don't forget to follow my blog by adding your email to the right under the "Follow Me" section!  

Card Cuts & Instructions:

Cuts - DSP = Designer Series Paper

Card Base - Cinnamon Cider - 5 1/2 x 8 1/2 scored at 4 1/4

Layer 1 - Beauty of the Earth DSP - 2 1/8 x 5 1/2

Layer 2 - Night of Navy - 2 x 2

Layer 3 - White - 1 3/4 x 1 3/4

Layer 4 - Beauty of the Earth DSP - 3 x 3 1/2 (tree bases)

Layer 5 - White - 2 1/2 x 3 1/2 (Trees)

Layer 6 - Night of Navy - 1 x 3 (Birds)

Layer 7 - White - 4 x 5 1/4 

Instructions:

  1. Layer 1 - Adhere to the card front flush to the right hand side.
  2. Layer 3 - Using Merry Merlot ink stamp the sentiment.  Then adhere to Layer 2.
  3. Layer 2 - Using Dimensionals adhere Layer 2 & 3 to the card front centering on card front placing as a diamond.
  4. Layer 4 - Using the Dies cut out two tree bases. Adhere to the card front as shown. (You may need to trim the bottom of the tree bases).
  5. Layer 5 - Using Merry Merlot and Cinnamon Cider inks stamp the tree top images (These are 2 step stamping images) . Then cut out with dies. Adhere to the tops of the tree bases. 
  6. Layer 6 - Using the dies cut out 2 birds.  Then adhere to the tree tops.
  7. Layer 7 - Using Merry Merlot stamp the sentiment centering onto sheet.  
    • Then stamp tree top using same ink as in step 5.
    • Last using the small dotted image and Night of Navy ink stamp as shown.
  8. Tie two bows with ribbon and adhere to the tree bases with Mini Glue Dots on the card front. 
  9. Adhere 7 of the Clear Epoxy Essentials as shown. 

Supply List: (If you'd like to purchase any of the items just click on the pictures below)
Product List


Dont' forget to take some time and leave me a comment!