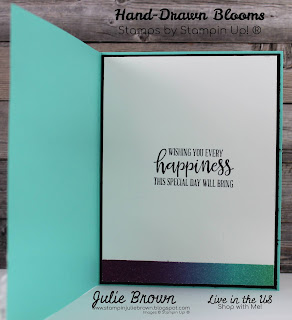
Thanks for visiting my Blog today! If you like sparkle this is the card for you! The dies that come with the Hand-Drawn Blooms Bundle make this card so simple and quick! I used the beautiful Rainbow Glimmer paper to cut out this die and it's so shimmery and pretty! I love quick cards that look like you spent a lot of time making and this one hits that ticket! Please let me know what you think!
If you'd like to be notified when I post new cards on my blog please enter you email to the right and click submit and you will get an email each time I post a new card to my Blog!!!
Here's a link to a video I did making this card and 2 others with this same bundle and the Artistry Blooms Suite!
https://www.facebook.com/StampinJulieBrown/videos/352382699090098
Starts at 50:53
Instructions:
Cut and Card Base: DSP = Designer Series Paper
Card Base - Coastal Cabana - 5 1/2 x 8 1/2 scored at 4 1/4
Layer 1 - Basic Black - 4 x 5 1/4
Layer 2 - Rainbow Glimmer Paper - 4 1/4 x 5 1/2
Layer 3 - Basic Black - 4 1/8 x 5 3/8
Layer 4 - Whisper White - 4 x 5 1/4
Layer 5 - Rainbow Glimmer Paper - 1/2 x 4
Instructions:
1. Adhere an adhesive sheet to the back of Layer 2 (Glimmer Paper) then using the Large Flower Banner from the Banner Blooms dies cut out image! (NOTE: You will want to run it back and forth a few times to insure that it has cut all the way through or you may want to use a piece of card stock as a shim.) Remove backing and adhere to Layer 1 (Basic Black).
2. Using the Stamparatus and Black Memento ink, stamp the sentiment from the Hand-Drawn Blooms stamp set onto Layer 2 (Glimmer Paper). (The reason I use the Stamparatus for this is because I am stamping onto glimmer paper and the stamparatus allows me to re-stamp as many times as I need to get a good image!)
3. Wrap ribbon around bottom edge of Layer 1 (Basic Black) and Layer 2 (Glimmer Image) about 3/4" from bottom edge then adhere to the card front!
4. Make a bow and adhere to the ribbon on the right side with a Mini Glue Dot!
5. Adhere both to the card front!
6. Adhere Layer 3 (Basic Black) into the inside of the card.
7. Stamp the sentiment from the Peaceful Moments Stamp set in Black Memento ink onto the center of Layer 4 (Whisper White) then adhere onto Layer 3 in the inside of the card.
8. Adhere Layer 5 to the bottom of Layer 4.


No comments:
Post a Comment