Monday, March 7, 2022

Kylie's International Projects Highlights - Ranunculus Romance Thank You!


I hope you are all enjoying all the cards in this group!  

This card I had originally made as a Congratulations card for a team swap, but liked it so much I turned it into a Thank you card to send to my customers!

I used the Ranunculus Romance bundle along with the Layering Circle Dies.

I love that this card was designed by using the stamps to create this beautiful background. 

This card is so quick and easy to put together I hope you will try it out!

Don't forget to vote for me!


Card cuts & Intructions:

Card base - Fresh Freesia - 5 1/2 x 8 1/2 scored at 4 1/4
Card stock:
 - Evening Evergreen - (2) 4 x 5 1/4,  2 1/2 x 2 1/2 (scalloped circle), 2 x 3 (leaf) 
- Very Vanilla - (2) 3 3/4 x 5, 2 x 2
-Fresh Freesia - 1 1/2 x 3 (flower)

Instructions

1. Using the Ranunculus Romance stamp set and Fresh Freesia and Evening Evergreen ink, stamp the flower images onto the one of the 3 3/4 x 5 Very Vanilla pieces as shown.
2. Adhere one of the Evening Evergreen 4 x 5 1/4 pieces to the front of the card base.  Then adhere the piece you just stamped to this piece on the card front.
3. Using the Ranunculus Dies cut out the following:  Embossed leaf from the 2 x 3 Evening Evergreen piece.  Flower from the 1 1/2 x 3 Fresh Freesia piece.  Cut the Flower into two pieces. set aside.
4. Using the Layering Circle Dies cut out the following: Scalloped circle from 2 1/2 x 2 1/2 Evening Evergreen piece and Smaller Scalloped circle from the 2 x 2 Very Vanilla piece.
5. Stamp the sentiment from the Ranunculus Romance stamp set onto the Very Vanilla circle.  Then adhere it to the Evening Evergreen circle.  Using dimensionals adhere both to the card front in the upper left corner of the 3 3/4 x 5 Very Vanilla piece on the card front.
6. Then add the Evening Evergreen leave and the Fresh Freesia flowers by sliding them under the sentiment circles.  
7.  On the inside: Stamp the flower and leaves in the lower right hand corner as shown.  Then stamp the sentiment from the "Celebrating You" Stamp set in Evening Evergreen.  Then stamp the leaf image by stamping it off two times then stamping it over the sentiment. 
8.  Adhere the other Evening Evergreen piece to the inside.  Then add the Very vanilla piece.
All done!
9.  Adhere the In Color Jewels as desired onto the card front!

Below you will find a list of supplies used and don't forget to leave me a comment below and let me know what you think!
Product List


Saturday, January 29, 2022

Nuts & Bolts Masculine Valentines Card

Welcome to my blog!  I don't know about you but I am always in need of masculine cards so I decided to design one for Valentines day! 

The Nuts and Bolts stamp set works perfect for me as my Husband runs a mechanic shop in our town so I thought this one would be just right!

This is such a fun set to work with and I did design one more Valentine card a little less masculine and a fun treat box so watch for those here on my blog!

Below you will find the card cuts, instructions, supply list and a link to the video I did with all three of them!  Enjoy!

Don't forget to sign up for my newsletter so you can stay up to date all that is happening in the Stampin Up® world and my cards!

Card cuts: DSP = Designer Series Paper

Card base - Basic Gray - 5 1/2 x 8 1/2 scored at 4 1/4

Card stock:
Pool Party - 2 3/4 x 4 1/4
Basic White - 2 1/2 x 4 & 4 x 5 1/4

DSP:
Sweet Talk - 2 1/2 x 4 1/4

Instructions:

1. On the 2 1/2 x 4 Basic White piece stamp the robot image using Black Memento ink towards the top of the sheet.
* Color in using Stampin Blends (I used Pool party and Smokey Slate)

2. Just below the robot stamp the sentiment in Pool Party ink. Then the hearts in Black Memento ink.

3.  Adhere the DSP to the card front centering top and bottom

4. Adhere the Pool Party Matte to the card front centering over the DSP

5. Adhere the Basic White piece that you just stamped to the Pool Party matte on the card front

6. On the other Basic White piece:

*Stamp the robot image in the lower right hand corner then color in with blends

*Stamp the sentiment onto the center of this sheet

*Adhere to the inside of the card.

Your all done!  Quick and Easy!

I'd love to hear from you so consider leaving a comment for me below!

Supply List: (Note to order just click on any of the pictures below)

Product List


Video Link:  https://www.youtube.com/watch?v=Td2nVZ9x0Zk


Friday, January 28, 2022

Rainbow of Happiness Positive and Negative

Here's another fun idea using the Rainbow of Happiness Bundle!  I got my originals idea from Sara Douglas CEO, Stampin Up®  She reminded us to use both the negative and positive pieces when we die cut..

For this card I used the rainbow die then stamped onto the negative pieces to give this card a fun look!

I also used the Sunshine and Rainbow DSP which is one of the free products you can get with a minimum purchase during the Jan-Feb 2022 Sale A Bration.

Don't forget to sign up for my newsletter so you can get the lastest news and card ideas!

Below you will find the card cuts, instructions, supply list and a video link for this card and two other card.

Card cuts - DSP = Designer Series Paper

Card Base - Thick Basic White - 5 1/2 x 8 1/2 scored at 4 1/4

Card stock - Misty Moonlight - 4 x 5 1/4

Basic White - 3 3/4 x 5 & 3 x 4

DSP - Sunshine & Rainbow - 4 x 5 1/4

Specialty Paper - In Color Shimmer Vellum - 3 3/8 x 4 5/8

Instructions:

1. Adhere DSP to the card front.

2. Placing Stampin Dimensionals in the center of the Shimmer Vellum adhere to the card front at an angle.

3. Using the Brilliant Rainbow Dies:

* Cut out the Rainbow die placing it about 1/2" from top edge and centering. (Make sure to keep the rainbow strips that cut out with this)

*Using the four small stamp images (raindrops,hearts,lines & dots) stamp the rainbow strips like so:

*Smallest strip - Raindrops in Granny Apple Green ink

*Next Strip - Hearts in So Saffron ink

*Next Strip - Lines in Pool Party ink 

*Next Strip - Dots in Misty Moonlight ink

*Using Misty Moonlight ink stamp the sentiment below the rainbow cutout! 

*Adhere the 3 x 4 basic white piece with the rainbow cutout onto the card front placing it at an angle as shown making sure to cover the dimensionals under the shimmer vellum. (Note: make sure to add liquid glue to the rainbow cut out to hold down the rainbow)

*Apply foam strips to the backs of all the stamped rainbow strips then place back into place on the rainbow cutout! 

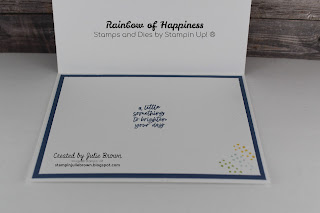
4. For the inside of the card:

*Adhere the Misty Moonlight piece in the inside of the card.

*On the Basic White piece stamp the sentiment in Misty Moonlight ink centering.

*In the lower right hand corner stamp the dot images three times (once in Pool Party, once in Granny Apple Green and once in So Saffron) 

*Adhere to the Misty Moonlight matte on the inside of the card.

Supplies: (Note if you need any supplies just click on any of the pictures below to go to my online store)

Product List


Video Link:  https://www.youtube.com/watch?v=WrpDvNDvWoM


Thursday, January 27, 2022

Rainbow of Happiness & Stitched So Sweetly

Yes, Its more rainbows!  My goal here is to show you fun ways to use other dies you may have to make a cut card along with the Rainbow of Happiness Bundle by Stampin Up®!

For this card I brought in the Stitched So Sweetly dies and the Sunshine and Rainbow DSP (a Sale A Bration item)

This is yet another quick and easy card to put together but oh so cute!

Don't forget to sign up for my newsletter so you can get all the newest updates and card ideas!

Also I'd love to hear from you so please leave me a comment below!


Below you will find the Card cuts, instructions and video link.
Card Cuts:
Card Base - Thick Basic White - 5 1/2 x 8 1/2 scored at 4 1/4
Card Stock - Gorgeous Grape - 4 x 5 1/4
Basic White - 3 x 4 & 3 3/4 x 5

Instructions:

1. On the 3 x 4 Basic White piece stamp the rainbow:
*First small pool party rainbow

*Second Bermuda Bay rainbow stamped off, then stamp design full ink over the top.

*Third Granny Apple Green rainbow stamped off, then sentiment full ink over the top.

*Fourth Gorgeous Grape Rainbow

*Then using the Brillian Rainbow Dies - cut out four clouds

* Fussy cut out the rainbow.  Set aside.

2.  Using the Stitched So Sweetly dies:

*cut out 2 mattes in different sizes and using different patterns from the Sunshine and Rainbows DSP. 

*Adhere the larger mattes horizontally towards the left edge and centering top and bottom

* Then adhere the next matte Vertically at an angle as shown. 

3.  Using stampin dimensionals adhere the rainbow over the top of both mattes.

*Next add the clouds by adding a little liquid glue at the top edge and mini dimensionals on the bottom edge. 

4.  For the inside of the card:

* Adhere the Gorgeous Grape piece.

*Stamp the sentiment in Granny Apple Green centering.

*In the bottom right hand corner stamp a small rainbow in Pool Party then a medium Rainbow in Bermuda Bay.

*Adhere to the Gorgeous Grape matte.

Supplies used: (To order just click on any of the pictures to go to my online store)

Product List


Video Link: https://www.youtube.com/watch?v=WrpDvNDvWoM

Note: This video has a total of three cards using this bundle!


Wednesday, January 26, 2022

Rainbow of Happiness Die Template

Welcome to my blog!  I hope you like rainbows because this card if full of them!

I'm using the Rainbow of Happiness Bundle by Stampin Up® along with the Sunshine & Rainbow Designer Series paper which is one of the free products you can receive during the Jan-Feb 2022 Sale A Bration event!

For this card I actually used one of the dies from the Brillian Rainbow Dies (part of the bunjdle) to create a template for the rainbow borders! I used sponge daubers to color the rainbow border!

Here are the card cuts, instructions and supply list and Video link!  Dont' forget to sign up for my newsletter to keep up with the latest news and card ideas!

Card cuts- Designer Series Paper = DSP
Card base - Gorgeous Grape - 5 1/2 x 8 1/2 scored at 4 1/4
Card stock - Basic White (2) - 4 x 5 1/4, (2) - 1 1/2 x 2 1/2, 1 x 6 (border template)
DSP - Sunshine & Rainbow - (2) different patterns - 7/8 x 3
Instructions:
1. Using the Brilliant Rainbow Dies:

       * With the 1 x 6 Basic White piece cut out the rainbow border.  Set aside.

      * With the (2) 1 1/2 x 2 1/2 Basic White pieces cut out 2 of the tags with the rainbow ends! Set aside. Stamp the sentiment onto the label using Gorgeous Grape ink. 


2.  Using the Rainbow border that you just cut out, position onto one of the 4 x 5 1/4 Basic White pieces, secure in place then using a sponge dauber and Gorgeous Grape ink daub the rainbow's to make the border across the bottom.  You will move up the sheet positioning the template just above the previous border and do the next row.  I used Gorgeous Grape for the bottom then Bermuda Bay, then Granny Apple Green, then Gorgeous Grape again and last (at the top) Bermuda Bay. 

3.  Adhere to the card front.

4.  Next glue together the 2 tags so that you have a rainbow in each end. 

*Take one of the DSP strips and thread through the one end to the other. Use a Mini Glue dot to attach it to the label in the back.

*Then take the other DSP strip and angle it opposite of the first one and secure in the back.

* Adhere to the card front using Stampin Dimensionals 

5. For the inside of the card. Use the border template once again along the bottom edge of the other         4 x 5 1/4 Basic white piece and use Granny Apple Green ink and a sponge dauber to color in.

6. In the center:

* Stamp the smallest solid rainbow in Granny Apple Green 

*Next stamp the next largest solid rainbow in Bermuda Bay

* Then stamp the next largest solid rainbow in Gorgeous Grape but make sure to stamp off for this one.  Then using the sentiment rainbow stamp over the solid rainbow in full ink.  

7. Adhere to the inside of the card. 

Supply List - If you'd like to order any of the products just click on the pictures below!  Note: the video link is below the supplies!

Product List


Video Link: https://www.youtube.com/watch?v=WrpDvNDvWoM  There are three different cards in this video!