Thursday, August 19, 2021

Encircled in Friendship and Friends

Welcome to my blog!  Today I have three cards all using the Encircled in Friendship bundle by Stampin Up® plus some friends?

These cards were a blast to design.  I don't know about you but I sometimes forget to mix and match my stamp sets and dies.  I tend to get in a rut and only use Stamps sets and dies that come in a bundle.  So today I'm climbing out of my rut and playing with several sets all together.  I hope you enjoy them!

Don't forget if you'd like to be notified when I post a new blog just add your email to the right under the follow me section and you will know each time I add a new card!

At the end of the post I will add the link for the video I did with all of these cards so be watch for it!

So here we go!  First up is the Encircled in Friendship paired up with Party Pattern Designer Series Paper and the In Bloom Stamp set.  For this card I wanted to design my own background for the die cut out!

Card Cuts - DSP =  Designer Series Paper

Card Base - Granny Apple Green - 5 1/2 x 8 1/2 scored at 4 1/4

Layer 1 - Pattern Party DSP - 4 x 5 1/4

Layer 2 - Basic White - 4 x 4

Layer 3 - Basic White - 2 1/4 x 2 1/4

Layer 4 - Basic White - 4 x 5 1/4

Instructions:

1. Wrap ribbon around Layer 1 as shown then adhere to the card front. 


2. Using the Encircled in Beauty Dies cut out the large scalloped die as shown. Stamp the flowers as shown onto Layer 2.  Color in with Stampin Blends.  Then using the small dotted stamp from the In Bloom set add the dots as shown around the flowers.  Adhere to card front using Dimesionals as shown.

3. Using the same dies cut out one small scalloped die as shown. Stamp the sentiment as shown then add to the bottom right of the card front with Dimesionals as shown. 

4.  Tie a bow with the ribbon and using Mini Glue dots adhere to the card front as shown. 

5. Stamp Layer 4 as shown then adhere to the inside of the card.

Remember there will be a link to a video for all these cards after the last card!

Supply List for Card 1 - To order any supplies just click on the pics below
Product List
Next we have the Encircled in Friendship Bundle paired up with the Seasonal Labels Dies.  Did you notice that these dies will cut a strip in the label to allow a ribbon to be threaded through the label!

Card Cuts:  DSP = Designer Series Paper

Card Base - Thick Basic White - 5 1/2 x 8 1/2 scored at 4 1/4

Layer 1 - Pattern Party DSP - 4 x 5 1/4

Layer 2 - Pattern Party DSP - 2 3/4 x 4 1/4

Layer 3 - Basic Black - 2 1/2 x 3 1/2

Layer 4 - Basic White - 2 1/2 x 2 1/2

Layer 5 - Basic White - 2 1/2 x 3

Layer 6 - Basic Black - 4 x 5 1/4


Layer 7 - Basic White - 3 3/4 x 5           

Instructions:

1. Adhere Layer 2 to Layer 1 about 5/8" from top edge and flush with the left side.

2. Using the Seasonal Label Dies cut out the label from Layer 3 (make sure to use the small dies that cut out the strip for threading the ribbon).  

3.  Wrap ribbon around Layers 1 & 2 then thread through the Label as shown.  Adhere label to card front as shown and tie a know in the ribbon. 

4. Layer 4 - Using the Encircled in Beauty Dies cut out the small detailed circle as shown, stamp the sentiment then add to card front using dimensionals as shown. 

5.  Layer 5 - Stamp the flowers from the Encircled in Friendship stamp set in Black Memento ink then color in with Stampin Blends. Then fussy cut out around flowers and adhere them to the card front in the bottom right corner as shown.  Add Matte Black Dots as shown.

6. Layer 6 - Adhere to the inside of the card.

7. Layer 7 - Stamp as shown color in flowers then adhere to the inside of the card.

Supply List for Card 2 - 
Product List
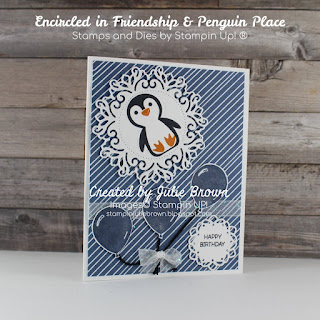
Now for the last card!  This card was designed using the Encircled in Friendship Bundle and the Penguin Place Bundle! Please note that the Designer Series Paper used for this card is a Sale A Bration item! 
 (For every $50 you spend you get to pick a free Sale A Bration item August 3rd - September 30th 2021)
Card Cuts - DSP = Designer Series Paper

Card Base - Thick Basic White - 5 1/2 x 8 1/2 scored at 4 1/4

Layer 1 - Penquin Playmates DSP - 4 x 5 1/4

Layer 2 - Basic White - 4 x 5 1/4 

Layer 3 - Basic White - 1 3/4 x 5 1/4 

Layer 4 - Basic White - 4 x 5 1/4


Instructions:

1. Wrap Ribbon around lower section then adhere Layer 1 to card front.

2. Layer 2 - Using the Encircled in Beauty Dies cut out the two circles pictured.  Set aside.

3. Layer 3 - Using the Penguin Place stamp set, stamp One penguin in Black Memento ink (I used Pumpkin Pie for the nose and feet) and three Balloons in Misty Moonlight ink. 

4.  Using the Penguin Builder Punch, punch out the penguin and adhere to the largest Circle die as shown.  Then fussy cut the three balloons. 

5.  Adhere the Large circle with penguin onto the card front as shown using demensionals. 

6.   Using Mini Glue dots adhere the black twine as shown (keep glue dots on just the ends).  Then adhere the balloons as shown.  

7. Using Black Memento ink stamp the sentiment as shown onto the small circle die.  Then adhere to the lower right hand corner as shown.

8.  Using Wink of Stella color in the balloons. 

9. Tie a bow with the ribbon and add to the card front as shown.

10.  Layer 3 - Stamp as shown on then adhere to the inside of the card. 

Supply List Card 3 (Note to order any supplies just click on the pictures)
Product List


Don't forget to leave me a comment below!


Wednesday, August 18, 2021

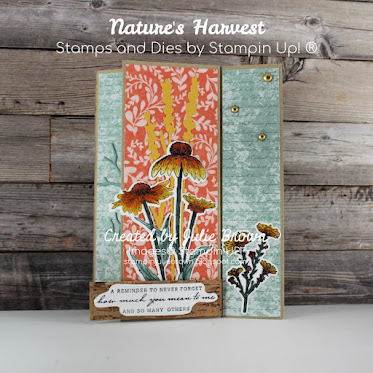
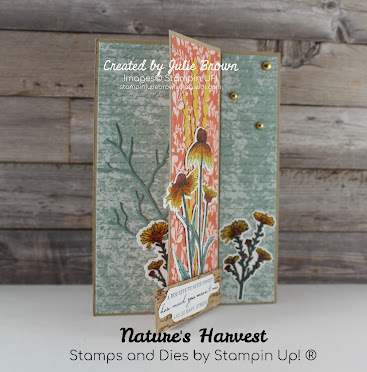
Fun fold Pinwheel with the Harvest Meadow Suite!

Thanks for stopping by today!  I love this pinwheel card because it's more than just a card.  One they open it they can use it to sit on a bookshelf or mantel for decoration!

I saw this fun fold on several different You Tube videos and Pinterest pages. The first one I saw was on Francie Martin's site.  So thank you ladies for the great idea. 

The card may look difficult to make but once you have all the pieces cut out it goes together really quick. 

Below you will find the card cuts, supply list  and link to my youtube video for this card!

Card Cuts: DSP = Designer Series Paper

Card Base - Crumb Cake - 5 1/2 x 4 7/8 scored at 1/2, 1 1/4, 2, and 2 3/4.  You will also need (3) Crumb Cake - 2 1/8 x 5 1/2

Layer 1 - Harvest Meadow DSP - 
--Pattern 1 - (1) 1 1/4 x 5 3/8, (2) 2 x 5 3/8, 
--Pattern 2 - (2) 1 1/4 x 5 3/8 , (2) 2 x 5 3/8 

Layer 2  - Basic White - (1) 2 x 5 3/8
--Harvest Meadow DSP  Pattern 1 (2) 5/8 x 2

Layer 3 - Basic White 3 1/2 x 6 1/2 

Layer 4 - Bumblebee - 4 1/2 x 5 1/2 

Layer 5 - Soft Succulent - 3 1/2 x 4

Layer 6 - Cork Specialty Paper - 3/4 x 2 3/4


Here is the video link - I have not added written instructions as I believe this is one that is easier if you watch it put together. 


Supply: I have included the suite plus the individual items that I used from the suite plus cardstock, ink, etc.  Please leave me a comment below and let me know what you think of this card!
Product List


Wednesday, August 4, 2021

Layering with the Encircled in Friendship Bundle by Stampin UP!

Welcome to my blog!  We all have those people in our lives that help to build us up, lend a shoulder and make us laugh.  Friendship is the name of game for this card!  

For this card I used the Encircled in Friendship Bundle , Ornate Floral 3D Embossing Folder and Tasteful Label Dies all by Stampin Up®!

Below are the card cuts, link to a video and supply list!

If you like this card please add your email to the right under the "Follow Me" section.

Here is the link to the video but don't forget to scroll down for the card cuts and supply list!

https://www.facebook.com/StampinJulieBrown/videos/509356727007342


Card cuts - DSP = Designer Series Paper

Card Base - Thich Basic White - 5 1/2 x 8 1/2 scored at 4 1/4

Layer 1 - Beauty of the Earth DSP - 1 x 5 1/4

Layer 2 - Neutrals DSP - 3 x 5 1/4

Layer 3 - Mossy Meadow - 1/2 x 5 1/4

Layer 4 - Basic White - 3 1/4 x 4 1/4

Layer 5 - Neutrals DSP - 3 x 4

Layer 6 - Basic White - 2 1/2 x 3 1/2

Layer 7 - Basic White - 4 x 4

Layer 8 - Basic White - 3 x 4 (Flowers)

Layer 9 - Merry Merlot - 4 x 5 1/4

Layer 10 - Basic White - 3 3/4 x 5

Layer 11 - Beauty of the Earth DSP - 1/2 x 3 3/4

Layer 12 - Basic White - 1 1/4 x 2 1/4 (Label)

Supply List: Note if you'd like to order any of the supplies listed below just click on any of the pictures to be taken to my online store!

Product List


Monday, August 2, 2021

For Dad! Hats Off Book Binding Card

Thanks for stopping by my blog today!  I am always in need of masculine cards.  For this card I wanted to do a different look so I created a Book Binding card!

I used the Hats Off Bundle by Stampin Up for this card!  This stamp set has several sentiments that can be added to the label on the hat so it is very versatile set!

This card shows how well using different card stock for matting really helps the overall look of the card. 

Below you will find all the card cuts, instructions and supply list!

Before you scroll down don't forget to add you email to the right under the "Follow Me" section so that you will be notified each time I add a card to my blog!

I would also love it if you would take the time to leave me a comment below!

Card Cuts: DSP = Designer Series Paper

Card Base - Night of Navy - 4 1/4 x 11 scored at 4 1/4 and 5 1/2

Layer 1 - In Good Taste DSP - 1 x 4

Layer 2 - Basic White - 4 x 4

Layer 3 - Night of Navy - 3 7/8 x 3 7/8

Layer 4 - Smokey Slate - 3 3/4 x 3 3/4

Layer 5 - In Good Taste DSP - 3 x 4

Layer 6 - Smokey Slate - 1 x 2

Layer 7 - Night of Navy - 1 x 3

Layer 8 - Basic White - 4 x 4

Instructions:

1. Apply adhesive to the 1 1/4 scored section on the inside then close so that it forms a book look.

2.  Layer 1 - Adhere to the front of the 1 1/4 scored section of the left side of the card front.

3. Layer 2 -  Adhere to the right section of the card front, centering.

4. Layer 3 - Adhere to Layer 2 on the card front.

5. Layer 4 - Stamp the sentiment in the lower left hand corner in Night of Navy Ink.

  • Adhere to Layer 3 on the card front.

6. Layer 5 - Using the large hat die cut out a hat.

  • Using your finger carefully curve the brim of the hat
  • Adhere to the card front as shown, using Stampin Dimensionals behind the brim to give it some lift.
7. Layer 6 - Using Night of Navy ink, stamp the "Dad" sentiment:
  • Using the Hat Builder Dies cut out label for front of hat.
  • Adhere to the large hat on the card front as shown.
8. Layer 7 - Using the Hat Builder Dies cut out one fish, one star, and one buffalo image.
  • Adhere to card front as shown.
9. Layer 8 - In the upper section stamp the sentiment and stars as shown.
  • Adhere to the inside of the card.
10. Wrap twine about three times around the left side of the card as shown. (I used Night of Navy twine that is retired but you can used any color you have on hand)


Hope you like this card and the fun Book Binding technique.  This is such a fun card to make and I hope that I have inspired you with tons of ideas for cards using this technique.

Supply List:  If you need any of the supplies to make this card you can order them by clicking on the pictures below! 
Product List