Thursday, July 16, 2020

Ombre Technique Series - Card 3 - A Little Lace

One of my favorite stamp set is "A Little Lace" by Stampin Up®. The images are so dainty and the cards come out beautiful. So of course I had to use this set in my ombre technique series. This time I used the purples and I'm in love. I hope you enjoy this card as much as I do!  Click on the link below to view the video I did making this card and 2 others in the Ombre Technique Series. 

https://www.facebook.com/watch/live/?v=3708078575934289&ref=watch_permalink

Again in the video I used White Craft foam that I bought at a local craft store but since then Stampin Up® has developed Foam Adhesive sheets which would be a lot easier to use!


Tuesday, July 14, 2020

Ombre Technique Series - Card 2 - Parcels and Petals

I really love it when I get to share my designs with others who love making cards! This is the second card in my Ombre technique series! I combined this technique with some embossing and a twist with some craft foam. Hope you enjoy the card!  Stampin Up® recently came out with Foam Adhesive Sheets that will be a lot easier then the White Craft Foam you can get from your local craft store. 

Here's a video that I did with three of the cards that I did in this series!  There is also step by step instructions below!

https://www.facebook.com/819342075094869/videos/3708078575934289


Project Recipe:

  1. Cut Instructions:
    Card Base: Melon Mambo - 5 1/2 x 8 1/2 scored at 4 1/4
    Layer 1 - Whisper White - 4 x 5 1/4
    Layer 2 - White Craft Foam & Whisper White 1 x 5
    Layer 3 - Whisper White - 4 x 5 1/4
  2. Layer 1 - Using Versa Mark ink and the Parcels and Petals Stamp set stamp the border image 3 times onto the sheet.
  3. You will want to start at the bottom and center the image. Then offset the next one towards the left and the last towards the right.
  4. Cover with White Embossing Powder then heat up with heat tool.
  5. Now your ready for the ombre technique. You will the following inks: Blushing Bride, Flirty Flamingo and Melon Mambo!
  6. Using the sponge brayers (1 for each color) add ink to the sheet starting with the darkest color at the bottom, then Flirty Flamingo and last Blushing Bride.
  7. You will be overlapping your colors as you move up the sheet. I did leave a small space at the top without any color. Using a lint free cloth wipe off any ink on the stamped image!
  8. Layer 2 - Originally I used Craft White Foam and the Adhesive sheets but since then Stampin Up has come out with Foam Adhesive Sheets.
  9. Adhere a piece of Adhesive sheet to the 1 x 5 Whisper White strip. Peal off backing then add the Whisper White strip.
  10. Using the Well Written Dies cut out the sentiment! Before you remove them add ink with the sponge brayer to the bottom of the words.
  11. Remove words and add to the card front as shown.
  12. Layer 3 - Using Stamp N Write markers color each of the flowers a different color (Melon Mambo, Flirty Flamingo and Blushing Bride) then stamp in the bottom right corner
  13. Stamp sentiment in Melon Mambo then adhere to the inside of the card.

Don't forget to leave me a comment below I would love to hear from you!

Order your supplies by clicking on the images below!

Product List


Monday, July 13, 2020

Kylie's Monthly Demonstrator Training Team Blog Hop - Celebrate Sunflowers Mix and Match

Welcome to our Demonstrator Training Team Blog Hop!  We have some exciting projects to show you from all over the world!  If your new to Blog Hops the way it works is as you scroll down this page you will see a list of names.  Just click on the name below mine and you will be on your way.  Each Blog that you go to will have the same list so eventually you will be led back to me!

One of the things I love to do is mix and match bundles,stamp sets and techniques. I find if I don't do this I often get stuck only creating with one bundle at a time. Stampin Up® designs all there stamp sets and bundles so that they can interact with each other very well. Here's a perfect example of adding different bundles, stamp sets, embellishments to create a great card!  Hope you like it!


Project Recipe:
Cut Instructions:

Saturday, July 11, 2020

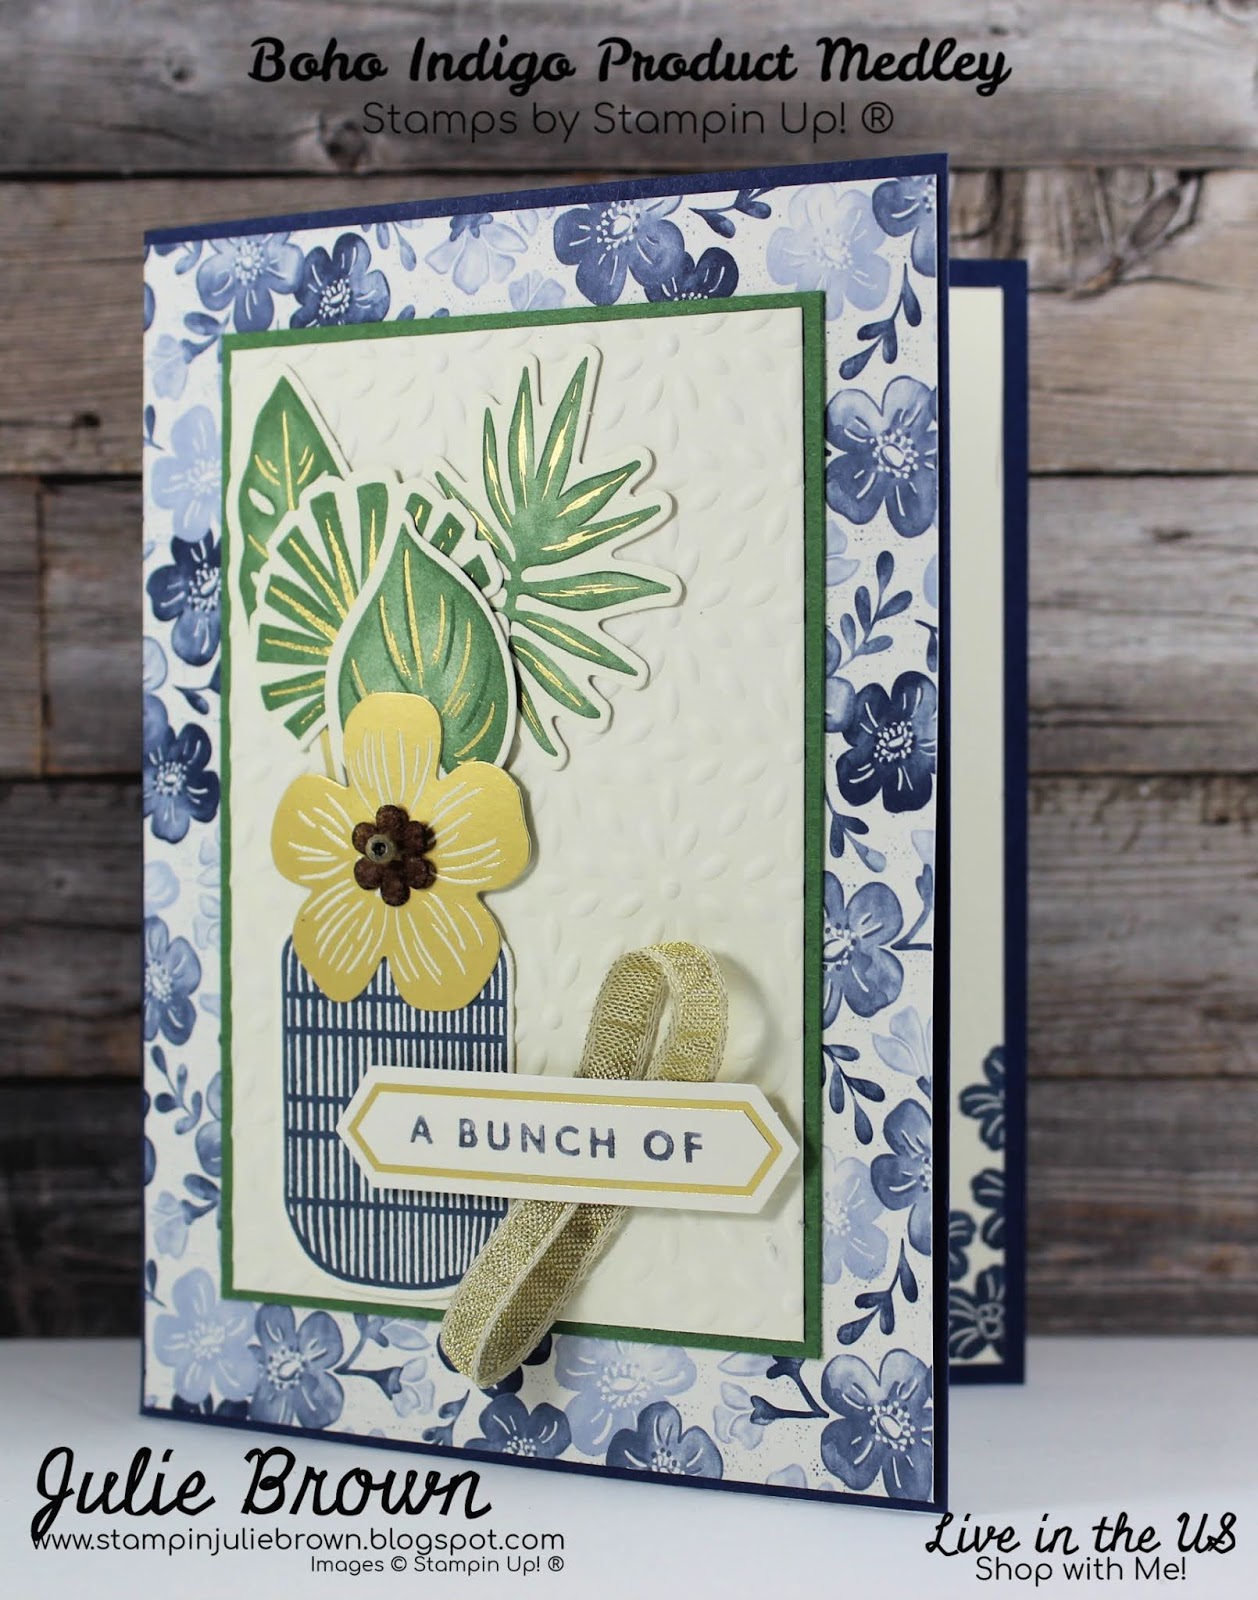
Boho Indigo Medley Series Card 3 - Splitting a stamp image without cutting the stamp!

Here's my third card in the Boho Indigo Product Medley series. This time I needed a Birthday card. My only issue was I didn't want to use the whole birthday sentiment on the front of the card. So by using the Stamp N Write markers I was able to separate the sentiment so that part went on the inside and part went on the front. I've had so much fun designing cards with this Product Medley. It sure makes card making fast and easy. If you are new to stamping and don't have a lot of supplies this is definitely something to consider. All you need to add is some card stock and adhesive.


Project Recipe:

  1. Cut Instructions: DSP = Designer Series Paper
    Card Base: Night of Navy 5 1/2 x 8 1/2 scored at 4 1/4
    Layer 1 - Boho Indigo DSP - 4 1/8 x 5 3/8
    Layer 2 - Garden Green - 3 1/8 x 4 3/8
    Layer 3 - Boho Indigo Very Vanilla Dry Embossed paper - 3 x 4 1/4
    Layer 4 - Very Vanilla - 2 x 2 1/2
    Layer 5 - Boho Indigo Gold Foil Die Cuts
    Layer 6 - Boho Indigo Very Vanilla/Gold Pleated Ribbon
    Layer 7 - Boho Indigo Gold Foil Label
    Layer 8 - Very Vanilla 4 x 5 1/4
  2. Layer 1 - Adhere to the card front.
  3. Layer 2 - Adhere to Layer 1 centering on card front.
  4. Layer 3 - Adhere to Layer 2.
  5. Layer 4 - Stamp the large vase in Night of Navy ink then cut out with Boho Indigo Dies.
  6. Layer 5 - Using Layer 4 (do not adhere it yet) workout where you want your leaves to be then adhere the leaves so that the stem will be hidden behind the vase. (Layer 4)
  7. Once the leaves are adhered then adhere layer 4 (vase) over the stems of the leaves.
  8. Color one of the small felt flowers with the Bronze Stampin Blend then set aside to dry. (Note: because of the material of the flower this does take a bit to dry)
  9. Adhere one of the large Gold foil flowers to the top of the vase then add small flower to center.
  10. Layer 6 - Form ribbon as desired then adhere to the card front with Mini glue dots as shown. (Note: place glue dots so they will be hidden by label)
  11. Layer 7 - Using the Night of Navy Stamp N Write Marker color the words "A Bunch of" then stamp onto the Gold Foil Label.
  12. Adhere to the card front using Stampin Dimensionals.
  13. Layer 8 - Stamp the (3) flower image in Night of Navy in the bottom right corner.
  14. Color the bottom half of the sentiment "birthday love to you" with the Night of Navy Stamp N Write maker then stamp into the center.

15. Adhere to the inside of the card.


Thanks for stopping by my blog I hope I have helped to inspire you in some way.  Card making is something I enjoy and it's great when I get to share my creations!  Don't forget to leave me a comment below!

Here's a video of all three cards that I did with the Boho Indigo Product Medley! 


If you need any of the supplies to complete this card just click on the images below!

Product List