Friday, December 18, 2020

Warm & Toasty Fun Fold Card

I got this idea from Bright Acres Creations that made this fun fold card using the Snow Wonder Stamp set by Stampin Up® and the Snowflake Splendor Designer Series paper.  As soon as I saw the fun fold I knew I wanted to use the "Warm and Toasty" Stamp set by Stampin UP® and the "Plaid Tidings" designer series paper.  Such a cute idea for a card.  

I just love the deer in the peep hole!  Plus I really like the Plaid Tidings Designer series paper it really pops in this card!

Please don't be intimidated by the number of steps in this card it's really not that hard and goes together quicker then it looks.  

You will love it when it's done. If you try it leave me a comment below and let me know how it went!  

Don't forget to follow my blog just add your email to the right where it say's Follow Me. 


Ok so lets get going here are the instructions:

Card base and cuts: (DSP = Designer Series Paper)

Card Base = Cherry Cobbler - 5 1/2 x 8 1/2 scored at 4 1/4 

Flap = Cherry Cobbler  4 3/4 x 5 1/2 scored at 3/4 on the 5 1/2 side. 

Cardstock = Shaded Spruce - 4 1/8 x 5 3/8, 2 x 3; Whisper White 4 x 4, 4 x 5 1/4, (2) 1 x 6 1/2 

DSP = Plaid Tidings - 4 x 5 1/4 

Instructions: 

  1. Flap - On the 5 1/2 side score at 3/4" 
        

2. Cut flap – Using a pencil mark the flap 2 ¼ from the scored edge on the bottom and top edges then on the 5 ½ side mark 2 ¾ from bottom edge up.  


3. Then with your trimmer cut from the 2 ¾ mark to the 2 ¼ mark on each side.


4. Using the #3 Circle Die from the Layering Circles dies cut out circle in flap.


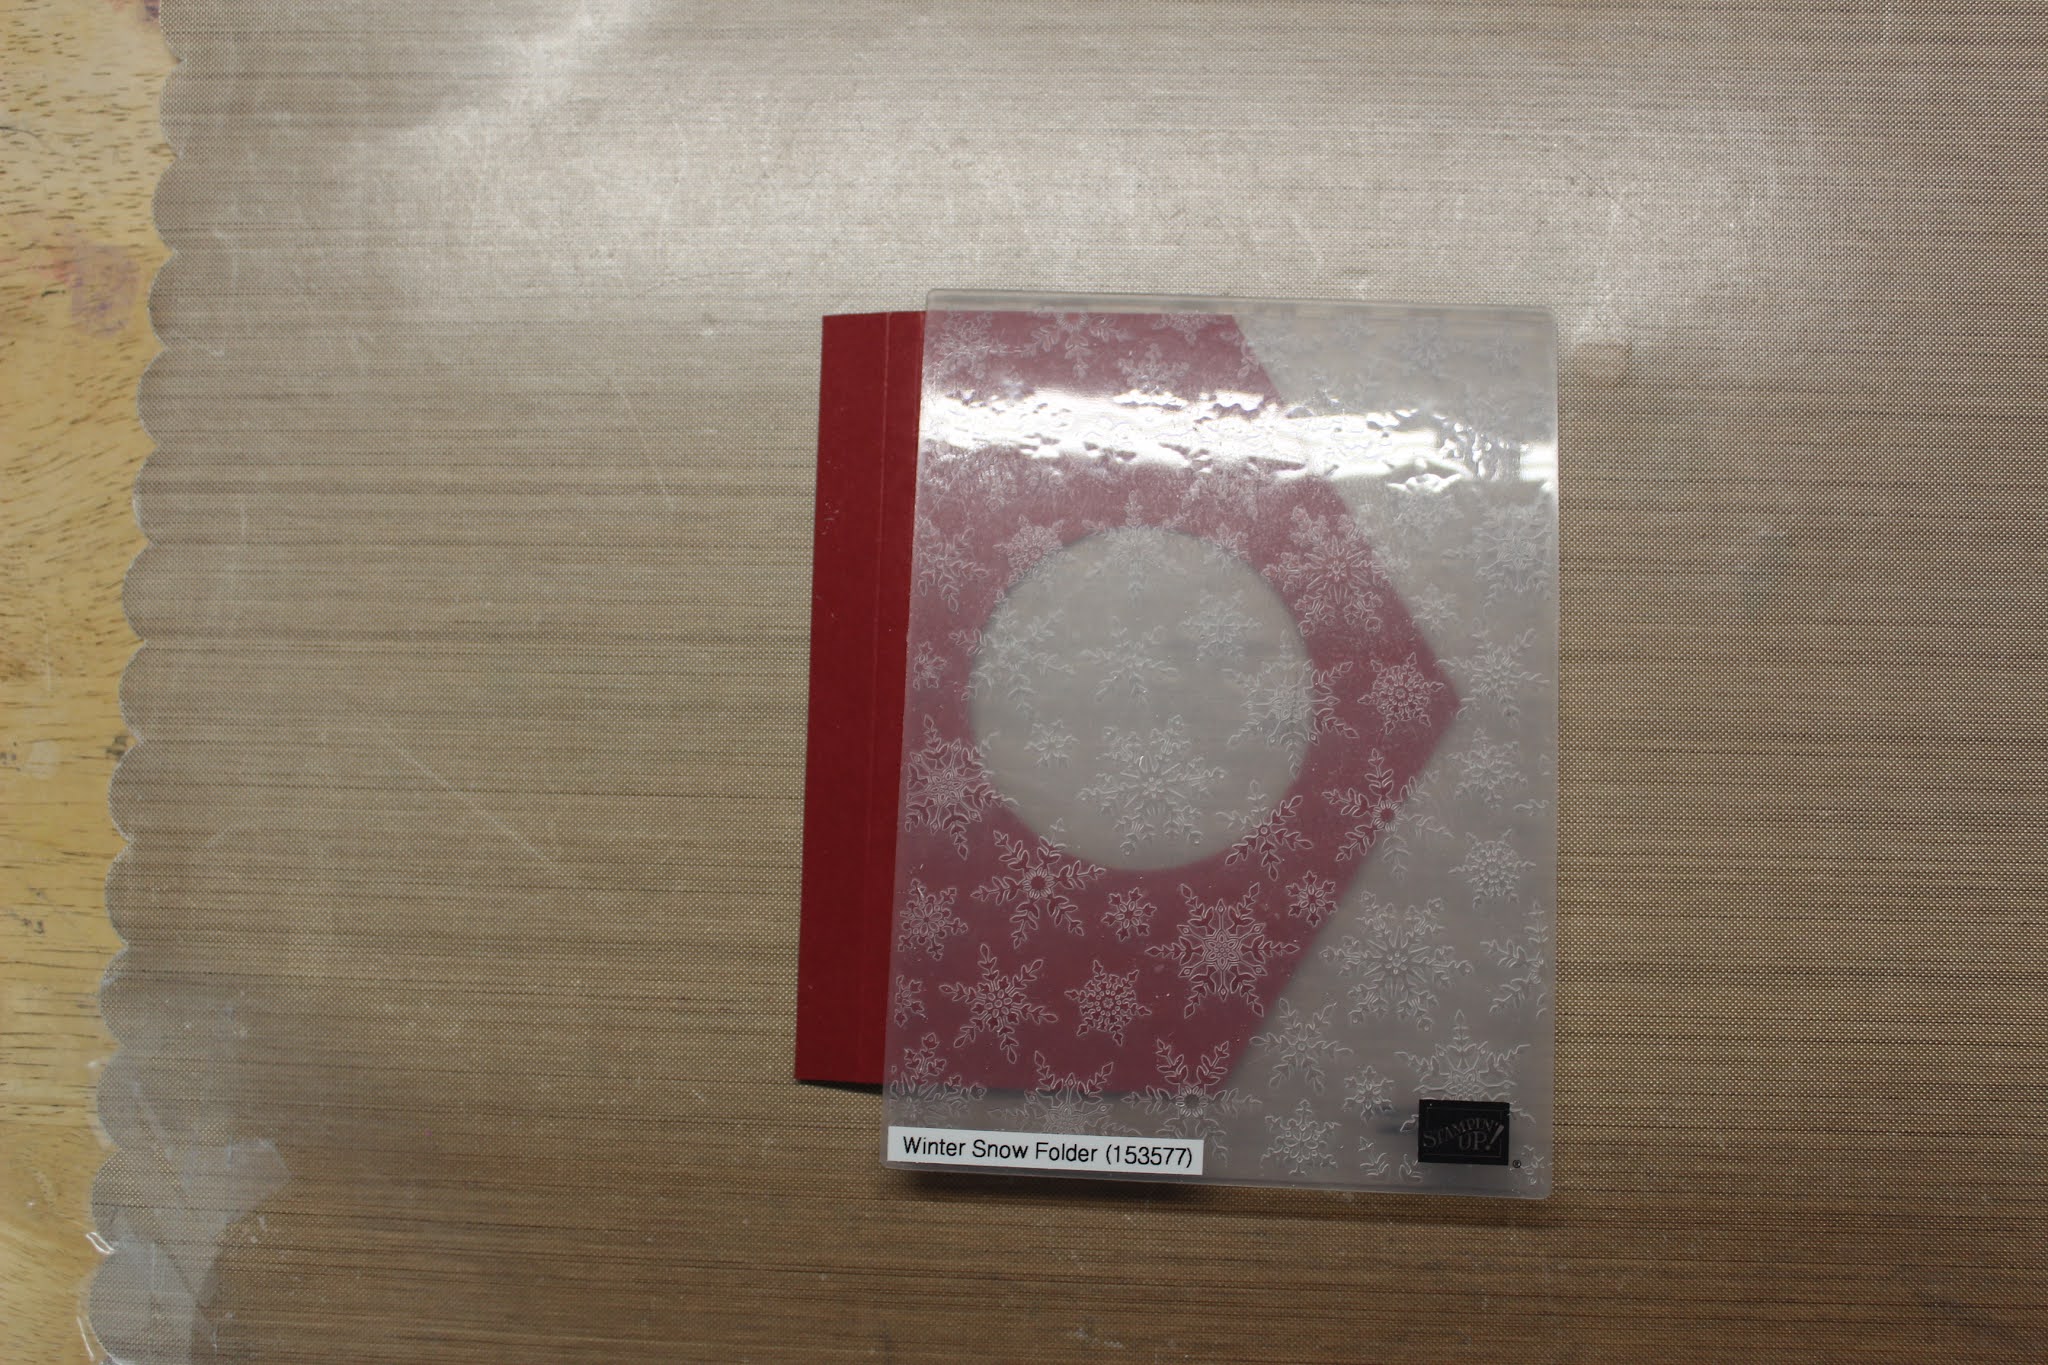
5.  Using the Winter Snow Embossing folder and the flap run through the Die cut machine. NOTE:  Do not emboss the scored edge keep it out of the folder. 


6.    Using the 2” punch and a Post-It-Note punch out a circle.


7.     Adhere the DSP to the Shaded Spruce matte. 

8.      Fold the card base backwards so that it opens from left to right. 


9.    Then place DSP/Matte onto card front using washi tape to hold it into place. (remember the card should be folded backwards)  


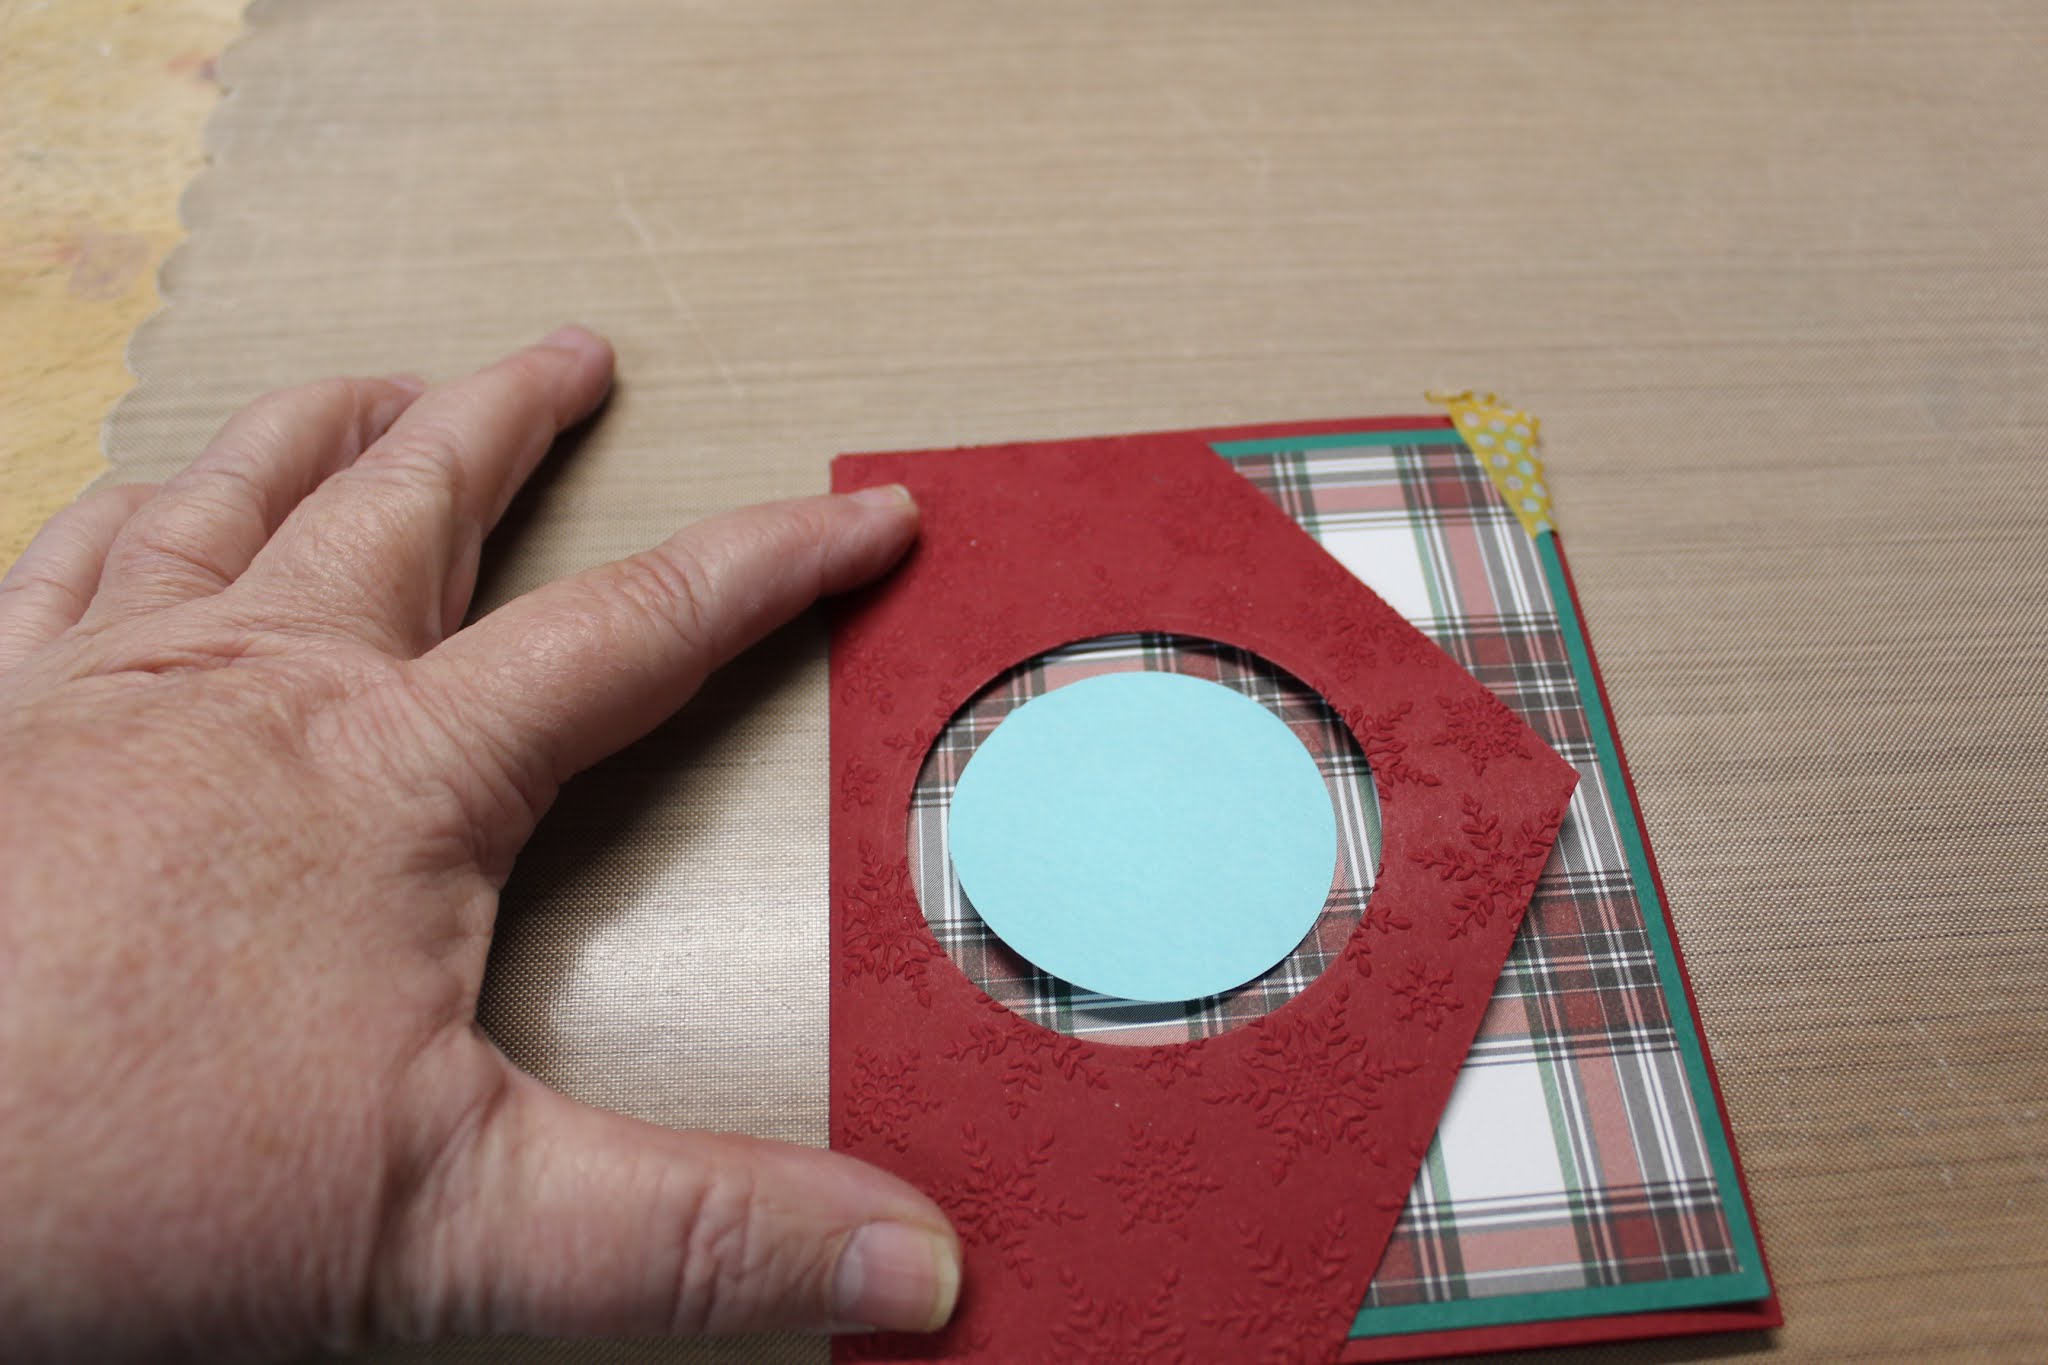
10.      Place card base into the scored edge of the flap and using the flap as your guide fold closed and place the Circle Post-it note onto the DSP/matte, remove from flap, separate from card front and cut out circle with the punch. 


11.   Now use the DSP/Matte as your guide.  Place  on the front of the card base (which should be backwards) 


12.  Place the Post-It note circle inside circle of DSP/Matte then move matte leaving the post-it-note on the card front and cut out circle from card front with Punch. 

 
13.  Place WW 4 x 5 ¼ piece on the inside of card close right side and using a pencil trace the circle.  


14.  Remove WW piece and stamp deer onto sheet with Black Memento Ink making sure the deer’s head is inside the circle.  Let dry a minute then erase pencil lines.


15.  Color in the deer. NOTE: I used Stampin Blends : Antlers/hooves - Soft Suede, Deer - Crumb Cake, Bow - Cherry Cobbler

16.   Stamp the sentiment in Shaded Spruce Ink and a couple of snowflakes next to the deers feet.

17.  Adhere to the inside of the card. (Note picture shows trim on front flap this has not been done yet)


18. Using the Ornate Border Dies cut out 2 borders from the 1 x 6 1/2 Whisper White pieces. 


 19.      Adhere borders to the edge of flap one at a time as you will need to trim one before you add the next one. 


20.  Burnish the score line very well then adhere the flap to the back side of the card base using Tear & Tape.  *****Very Important when you adhere it you need to close the card then place to the scored line and adhere******


 21.  Using the Layering circle dies cut out a scalloped frame using the #1 scalloped circle die and the #3 straight circle die from the 4 x 4 WW piece. 


22.  Adhere scalloped frame to the front of the flap.


 23.  
Stamp the sentiment onto the WW circle that you just cut out then using the Layering Oval Dies cut out straight edge oval using # 7 die. 

24.  Next using same dies and the 2 x 3 Shaded Spruce piece cut out a scalloped oval using #6 die.


     25.  Adhere sentiment oval to scalloped oval. 


     26.  Then place both on the front of the card flap as shown. 


     27.  Adhere Basic Pearls to card front as shown. 


     28.  Burnish flap again – it will eventually lay flat!

Whew!  All done!  See not so bad it just seems like a lot of steps.  Such a cute card!  Thanks again for stopping by my blog and I hope you jump in with both feet and try making this card!  Don't forget to let me know how it all comes out!

     If you need any of the supplies to make this card just click on any of the pictures below and you will be taken to my store!
Product List


Thursday, December 17, 2020

In the Pines blending technique

I've always loved the look of cards that are made with a blending technique but I was always intimated to try it!  It looked hard to do.  Well great news for anyone who has felt the same way that I did!  IT'S NOT HARD!  These cards always pop and I'm glad to say anyone can do it!  So for this card I used the In The Pines stamp set by Stampin Up®.  I also used a new tool that will be coming out in the January - June 2021 Mini Catalog.  So you will want to put this on your wish list for January. They are the new Blending Brushes.  I love them!  So lets take a look how I designed and created this card.  First I did do a video and the link is below!

https://www.facebook.com/StampinJulieBrown/videos/501068020844962

Card Base and Cuts:

Card Base = Night of Navy - 5 1/2 x 8 1/2 scored at 4 1/4

Layer 1 = Whisper White - 4 x 5 1/4

Layer 2 = Whisper White - 1 1/4 x 3 1/4

Layer 3 = Whisper White - 4 x 5 1/4

Scrap piece of Whisper White for snow drift

Instructions:

  1. Layer 1 - Using the In the Pines stamps and the detailed image that has four small trees, stamp the image in Black Memento ink on the left side about 1 1/2" up from the bottom edge stampin off the left side. (Note: this is a two-step stamp set)
    • Stamp again but this time on the right side about 3/4"  up from the bottom and right edges
    • Stamp again on the right side about 1 1/2" from bottom edge placing stamp images between the other trees stamped on this side. 
    • Stamp again on bottom edge about 1/2" from left edge. 
    • Then using the single detailed tree stamp one tree in the right bottom corner as shown.
    • Next using the solid image stamps and Night of Navy ink two step stamp all the trees you just stamped. 
    • Now we are ready to blend.  I used Highland Heather, Misty MoonLight and Nigh of Navy ink.  
    • First you will want to use a 1" circle punch and punch out a circle from a post it note.  Place the post it note where you want your moon to be! (Note: pay attention that you will be able to fit your sentiment to the left of your moon)
    • Next using the Blending Brush and the Highland Heather ink, in a circle motion apply the ink around the post it note getting it darking closer to the note then fading out as you move out. 
    • Next using Misty Moonlight and a Blending Brush and blend in the color down over the trees on the top of the page (Note: do not bring down the color lower then the second bunch of trees from the top you want some white at the bottom)
    • Next using Night of Navy again blend down same trees blending colors together.
    • Note: you may want to go back over some of the previous colors until you get the look you like. 
    • Now using the Pine Woods dies and the scrap Whisper White piece cut out the snow slopes.
    • Then position the snow drift onto Layer 1 (do not adhere) to form the lines you want for the snow drifts. 
      1. Using Sponge Daubers and Highland Heather and Night of Navy place the snow drift under the first set of trees and sponge in color under the trees. Note: You will want to sponge darker under the trees then when you are forming a hill. When forming hills that not under the trees most of the color should be on the die cut not Layer 1 you just want a very light line to form snow drifts. Continue this method until you have the hills that you want.  Make sure to go back and sponge darker under the sets of trees. 
    • Once you have finished with all your blending remove the post- it -note.
    • Adhere to the front of the card base.
  2. Layer 2 - Stamp sentiment in Night of Navy ink then using Stitched Rectangle dies cut out.  Using Stamping dimension adhere to Layer 1 in the upper left corner. 
  3. Layer 3 - Stamp trees in the lower right hand corner in Night of Navy ink as shown.  Then stamp the sentiment from the "Merry Moose" stamp set. 

I hope you will try this technique and don't forget to let me know how it goes.  I'd love to hear from you!  Please follow my blog by adding your email to the right under the Follow Me section!  Then you will be notified when I post a new card!

Need supplies for this card just click on any of the pictures below to be directed to my store!

Please note: Blender Brushes are not pictured below because they will not be available for purchase until January 4th.  You will also need post-it-notes. 
Product List