Monday, June 29, 2020

Kylie's International Highlights Winners - Boho Indigo Product Medley - Thank you card!

I am so excited that my card made it into the top ten for June.  I'm so thankful for all those who voted for my card.  I am truly humbled. I had so much fun designing the card and if you missed it please visit my blog to see the card with full instructions to recreate it!
I chose to design this card using the Boho Indigo Product Medley.  This is an amazing bunch of products and I had a great time designing this card! I Love this Medley so many possibilities so many cards.  I hope you like it!


Project Recipe:

  1. Card Instructions: DSP = Designer Series Paper
    Card Base: Thick Very Vanilla - 5 1/2 x 8 1/2 scored at 4 1/4
    Layer 1 - Boho Indigo DSP - 4 1/8 x 5 3/8
    Layer 2 - Very Vanilla - 2 x 4
    Layer 3 - Garden Green - 2 1/4 x 4 1/4
    Layer 4 - Vellum - 2 1/4 x 4 1/4
    Layer 5 - Night of Navy - 2 x 2 1/2
    Layer 6 - Very Vanilla - 4 x 5 1/4
    Layer 7 - Boho Indigo Gold Foil Die Cut
    Layer 8 - Boho Indigo DSP - 1/2 x 5 1/2
  2. Layer 1 - Adhere to the card front.
  3. Layer 2 - Using Garden Green ink stamp the leaves about 1/2" from top edge and centering left to right.
  4. Adhere to the left side of the card front leaving about 1/8" on the left, top and bottom edges.
  5. Layer 3 & 4 - Using the Boho Indigo Dies cut out One of each of the large leaves. You will end up with three Garden Green leaves and three Vellum leaves.
  6. Layer 5 - Cut out large vase then cut vase in half. Top to bottom. Set aside.
7.  Layer 6 - In Cherry Cobbler ink stamp the (3) flower image over the entire sheet.


8. Using a die cutting machine and the Boho Indigo Dies cut out four vases.


9. For the smallest vase you will want to back the decorative cut outs with a small strip of Very Vanilla.


10. Trim off any excess.


11. With scraps of Night of Navy cut small strips to adhere to the 3 smaller vases.


12. Adhere them to the tops of the three smaller vases as shown.


13. Adhere the two halfs of the Night of Navy vase to the side of the largest vase then wrap the Boho Indigo gold ribbon around the top of vase.


14. For the smallest vase tie a knot in the Forever Greenery Gold twine and glue to vase with Multipurpose Liquid glue.


15. On the next vase place a Mini glue dot on the back of the vase then wrap the Forever Green Gold trim around twice then tie a know. (Note: this trim unravels quick so it might help to but some tape on the ends until you are done tying knots)


16. The next vase which should be the second tallest. Adhere a Mini glue dot to the back then tie a knot in the front.


17. Adhere large vase to Layer 2 positioning over the stamped leaves using Stampin Dimensionals.  

18. Using the other three vases figure out where to position the leaves then adhere them to the card front. Using Stampin Dimensionals adhere the vases over each set of 2 leaves. 

 19. Color 5 of the felt flowers with Dark Cherry Cobbler stampin blend. Once dry adhere to card front as shown.  

20. Layer 7 - Stamp the sentiment in Cherry Cobbler ink then adhere to the card front in the top right corner as shown.  

21. Layer 8 - adhere to the inside of the card along the bottom edge. Then stamp sentiment in Cherry Cobbler ink and the flourish image in Night of Navy ink.  I used the "A Wish For Everything " Stamp set for the sentiment for the inside of the card!


Don't forget to leave me a comment below!

Have fun visiting all the blogs in this blog hop! To go to the next blog just click on the name underneath mine! 


To Purchase the Boho Indigo Product Medley and any other supplies you might need just click on the pictures below!

Product List


Saturday, June 27, 2020

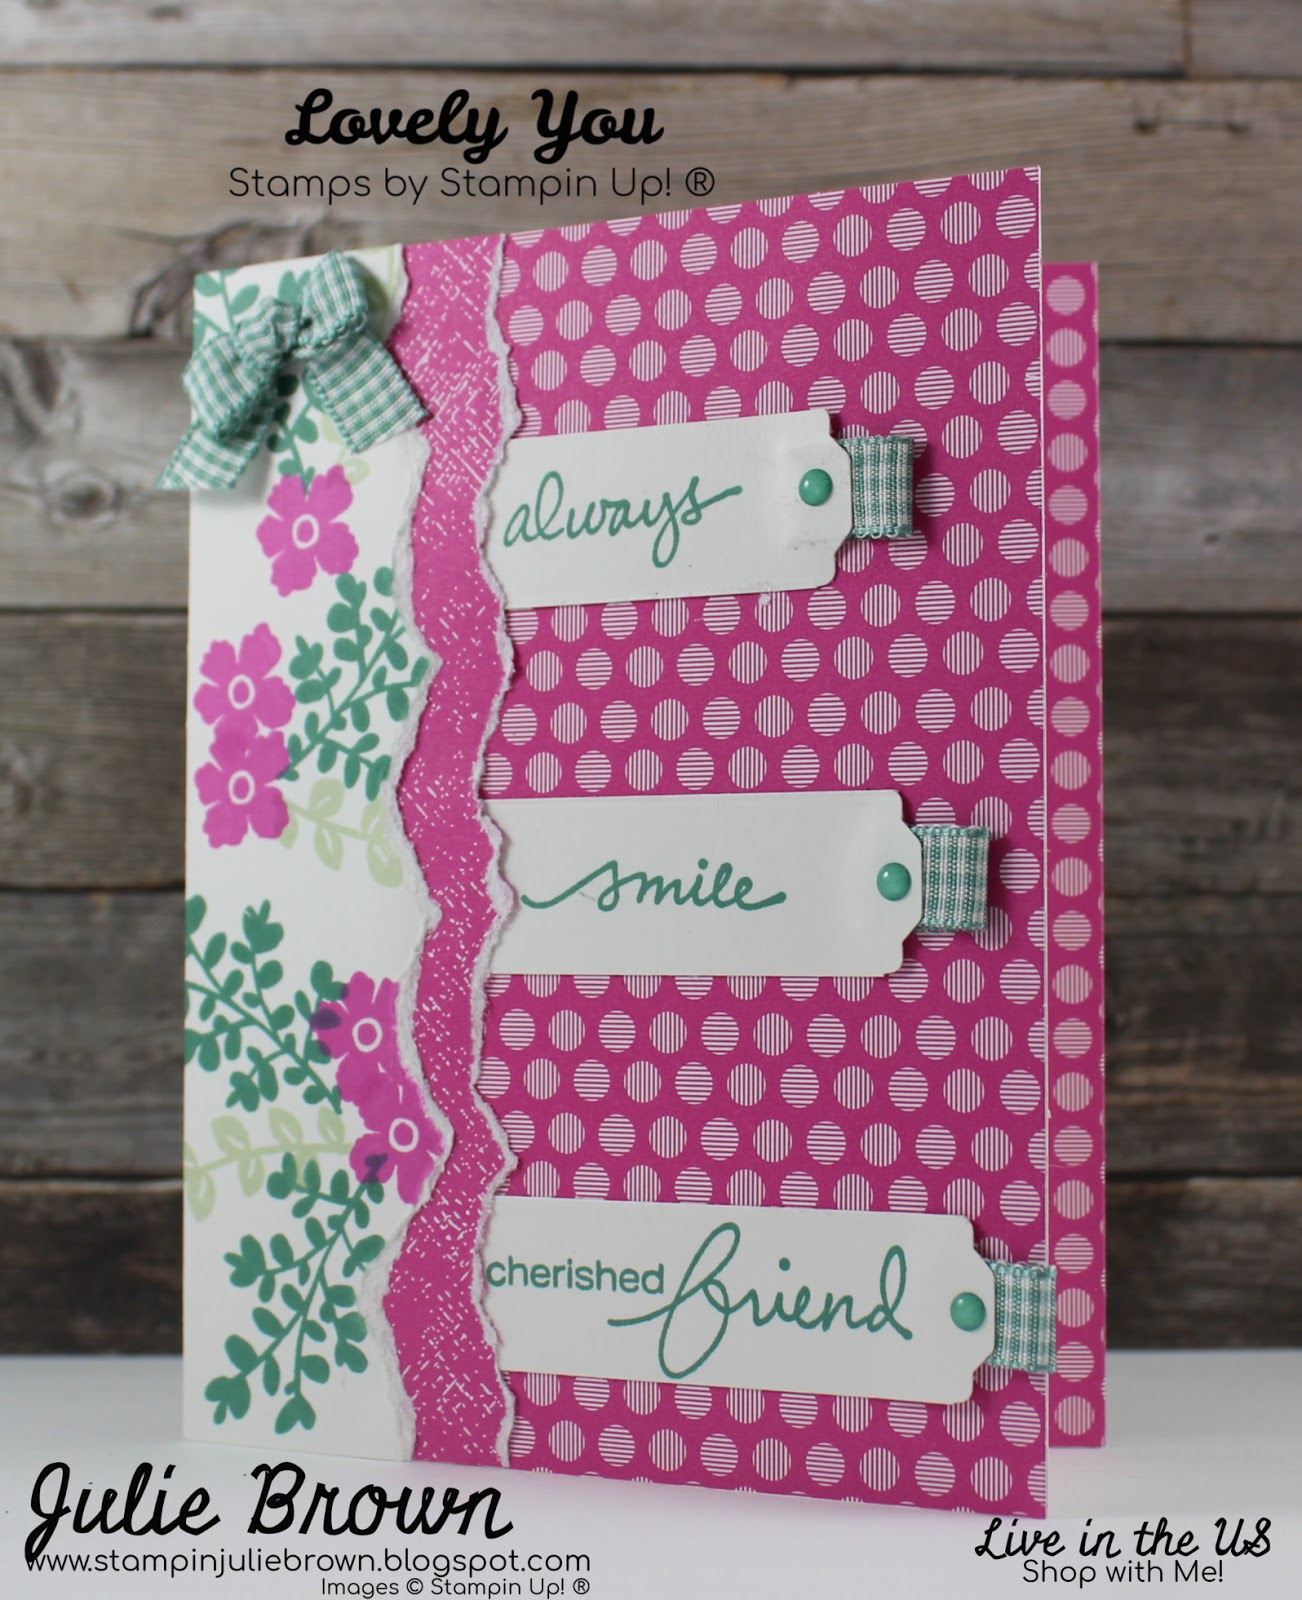
Lovely You Bundle - Friendship!

This was a fun card to design and make. I used the Lovely You Bundle from Stampin Up!® I haven't used the tearing technique in a long time but loved the way it looked on this card! Sometimes we need to fall back on some of the techniques that we haven't used in awhile to help us create some great cards!  I combined this with the Just Jade Ribbon from the Flowers for Every Season Suite and the 2020-2022 In Color Enamel Dots from Stampin Up!® and it finished it off just perfect.  If you haven't done the tear technique in a while for have never done it try it out.  I think you will love the outcome!

Project Recipe:

  1. Cut instructions:

    Card Base: Thick Whisper White - 5 1/2 x 8 1/2 scored at 4 1/4
    Layer 1 - 2020-2022 In Color DSP (Magenta Madness Polka dot) - 3 x 5 1/2
    Layer 2 - Whipser White - (3) 3/4 x 3
    Layer 3 - 2020-2022 In Color DSP (Magenta Madness back side of Polka Dot) - 2 x 5 1/2
    Layer 4 - Whisper White - 2 x 5 1/2
    Layer 5 - 2020-2022 In Color DSP (Magenta Madness Polka Dot) 1/2 x 5 1/2
  2. Layer 1 - Adhere to the card front flush to the top, bottom and right edges.
  3. Layer 2 - Stamp sentiments on strips in Just Jade Ink as shown. Then punch one side with the Lovely Labels Pick A punch.

                                                                                                                                                                                                                                        4.  Once you have punched one side then you will want to cut the other side down to the following:
Top: 2 1/4"
Middle: 2 1/2"
Bottom: 2 3/4"  

5. Adhere a small piece of folded ribbon to the end of strips on punched side.

6. Adhere to layer 1 as follows:
Top strip: about 5/8 from top edge and 1/2 from right side.
Middle strip: about 1" below Top strip and 1/4 inch from right side
Bottom Strip: about 1" below middle strip and flush to the right side of card front.

7.Layer 3 - Tear right side then adhere to the card front layering over the left edge of the sentiment strips.


8. Layer 4 - Using Just Jade, Mint Macaron and Magenta Madness ink pads stamp leaves and flowers onto this sheet.


9. Carefully tear right edge then adhere to the card front making sure you can still see Layer 3.


10. Tie a bow from the Just Jade Gingham ribbon and adhere to the top left corner of card front. 

11. Layer 5 - Adhere to the inside of the card flush with the top, bottom and right edges. 

12. Stamp sentiment and flourishes in Just Jade ink centering on inside of card.


13. To finish it off add one of the Just Jade enamel Dots to the end of each of the sentiment strips. 

Please leave a comment below and let me know what you think of this card!

Here is a link to a video for this card and 2 others using this bundle! The video did stop while filming the third card but you can find the continuation of that card on my facebook site Julie's Creative Stamping!


Don't forget to order your supplies to make this card!  Just click on the pictures below to order!

Product List


Thursday, June 25, 2020

Lovely You Simple Stamping!


Isometimes forget how beautiful a card can be using a stamp set, ink and some card stock. Here's a great example of how simple stamping can produce a great card!  The Lovely You stamp set by Stampin Up!® is perfect for simple stamping as it has so many pretty images plus so many sentiments. There are so many ways to use these images to create a beautiful stamped card!  This is also a very quick card to put together another great bonus for simple stamping!