
Welcome to our monthly blog hop! Your in for a treat! Just sit back and get your clicking finger ready to Blog Hop all over the world! What is a blog hop? It's a way for us to get together and share our card creations with you! This hop included Demonstrators from all over the world and your going to enjoy all the different cards! All you have to do is find the list below and click on the name right below my name! Then just follow the list from blog to blog until you get back here!
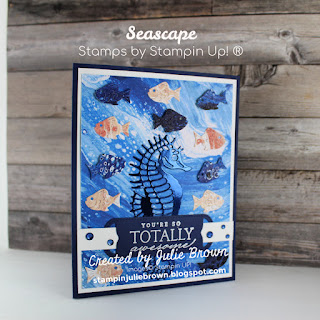
*Cut out the Sea Horse from the Blue Foil Specialty paper. (Note: It does not fully cut out so you will have to snips a couple places to remove it from the frame)
*Next cut out several fish from the DSP using both sides of the DSP so that you get different colored fish.
2. Using the Waves Dies and Waves of Inspiration Stamp set:
*Cut out the sentiment label
* Stamp the sentiment in Versa Mark ink then cover with White embossing powder and heat up!
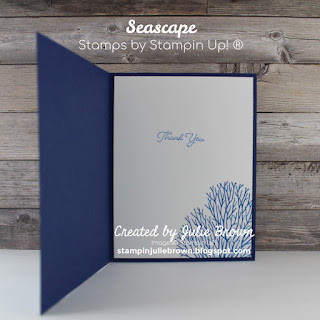
3. On one of the Basic White pieces stamp the coral in the lower right hand corner in Pacific Point ink and the "Sentiment" in the center.
Assembly:
1. Adhere the other Basic White to the card front!
2. Adhere the DSP to the Basic White piece.
3. Adhere the Sea Horse to the DSP centering and flush to the bottom edge.
4. Adhere the fish. (Note: I used dimensionals to pop up all the blue fish)
5. Run the 1/2 x 4 Basic White Strip through the Sentiment label and adhere both to the card front as shown.
6. Adhere the stamped Basic White piece to the inside of the card.
7. Use Wink of Stella to color in the fish on the front for some extra sparkle!
8. Add the Rhinestones to the Basic White strip on either side of the label!
Hope you enjoy this card! Don't forget my suppy list is just below these names!
Have fun Hopping today!
Supply List:
Product List
")


")
Wow! Love your card
ReplyDeleteThank you
DeleteThank you
ReplyDeleteFun card Julie! Thank you for taking part in our Demonstrator Training Blog Hop this month.
ReplyDeleteSuch a fun card. Thanks for sharing.
ReplyDeleteThank you
DeleteLovely fun card
ReplyDeletefun! :) love the shiny seahorse !
ReplyDeleteLovely card Julie, lots going on x
ReplyDeleteThank you yes lots going on I was imagining bring under the sea LOL
DeleteWhat a beautiful deep blue on your card. Looks like the Seahorse is loving the ocean.
ReplyDeleteThank you
DeleteAdorable! Great way to use this paper.
ReplyDeleteThank you
DeleteWonderfully fun card!!😊
ReplyDelete